Showing posts with label dress form. Show all posts

Friday, December 16, 2011

Copy your Figure: A Dressform Tutorial part 3


Part 3 of this tutorial shows how to pad out your mannequin to fit your cover along with all the finishing details. Listed here are all three parts of this tutorial:


First off, let me say a few things about the type of mannequin that will make a successful base for this project, because not all mannequins are equally useful. Use a mannequin that has a solid shape that cannot be depressed or compressed easily. The core shape can be Styrofoam, wire, paper maché- it doesn't really matter as long as it's not larger horizontally, or out of range for you vertically (back waist length). The closer to your own measurements, the less padding and fussing you'll need. My mannequin is a Dress Rite form*. I bought it because the waist length and upper body measurements were closest to what I needed overall.

*9-14-12 update: Dress Rite no longer sells full size mannequins. They sell 1/2 scale mannequins now.  Sew True sells several kinds of mannequins, professional and "dial" type forms at a reasonable price.


Step One: Pad out with 100% Cotton Batting
You will want to begin with the area that needs the most padding. I began by wrapping midriff, waist, and hip because I knew that these areas would be several inches too small and I would need a bigger base before beginning the precision padding. To do this, I used narrow strips just wide enough to get around the shape with minimal overlap and no gaping. I wrapped in a complete circle about 3/4 times, keeping the batting as tight as I could get it. I used straight pins to keep some areas snug, (but removed them before finalizing the shape). Once the base is good and even all over, it's time for the next step:

Step Two: Precision Padding
Put the cover on the mannequin, pinning the back closed. Step back to see where the figure needs filling out. I identify an area, and start filling in using shapes, such as rectangles, triangles, circles or any odd shape that will fit the section. Begin layering in graduated sizes that will fill in the area to get the desired effect.

Padding the hip curve with graduating rectangles
Padding out the tummy area

Fill in what will become the buttocks

I begin at the shoulders and work my way down the torso, continually replacing and removing the cover to add padding and check the tautness and smoothness as I go.

Make a silhouette comparison

Keep in mind the silhouette of the figure that you are copying. How much tummy to give? Where to tapper? Are the hips rounded with a larger tummy, or is the hip area more wide and narrow with a flat tummy? Once the silhouette is correct, MEASURE the mannequin to make sure that it matches your measurements in the same places.

Step Three: Finishing Touches
Finish up the mannequin by hand stitching the back closed. To add a neck, I used bias strips and hand stitched it in place. I made an armhole cover like this one:

I basted the circle, pressed it under. Now it's ready to stitch in place.

Added a few layers of batting cut into a circle, pinned the cover over it. It's ready to stitch.


I also added soutache in black to mark the bust, waist, hip and center front of my mannequin.
One day I will add a jewel neckline to it. 

Step Four: Shrink it Up
Once it's all stitched up, spray the mannequin nice and damp with clean water. Let it dry overnight, or better yet, use a hair dryer on it. The idea is to shrink the fabric, as cotton fabric will do, so that the cover will be nice and tight as a drum.

Whew! That was a lot of work, but well worth the trouble for those of us who use a mannequin, which I do, EVERY single day. Let me know if you use this tutorial to make your own mannequin. I'd like to know that it was helpful to someone.

Tuesday, November 29, 2011

Copy your Figure: A Dressform Tutorial part 2

Part 2 of this tutorial shows how to remove the wearing ease from your cover and shaping it for an exact duplicate of  your figure.
Here is a listing of all three parts:


Step One: Prepare for the Fitting

1. Plan to do this on a day when you are feeling good and have a good sewing friend handy. This is not a job you can do alone, nor can I over emphasize its importance. Don't ask your husband to fill in when he has no idea or interest in what you are trying to accomplish. Even working quickly with someone who knows what they are doing, expect it to take 2-4 hours from start to finish.

2.Wear a good well-fitting supportive bra. In fact, buy a new bra just for this occasion. Having made custom wedding gowns for many, many years, this is the one thing that 100% of my clients had in common. You want this mannequin to be the most attractive copy of your figure that you can give it. Besides, a droopy bust is really hard to copy.

3. Wear all of the same undergarments that you normally do. If you usually wear a girdle, or other supportive/ medical needs types of undergarments, do your fitting with those on as well. It's okay to wear a full body leotard as my model did- for modesty.

Step Two: Pin it up Tight as a Drum

Pinning the back
1. Put the cover on, with seams outward, pinning closed at the side seams and back at seam lines.
2. Make a determination on how and where to take away the wearing ease to make the cover completely form fitting. If the original pattern was fitted to your figure before attempting this project, the wearing ease for width will be almost evenly distributed throughout. There should be a small amount of ease for height as well. I wish I could say to start with the width and then take out the height, but it's not quite that simple. The main thing to keep in mind is to maintain an even waistline, parallel to the floor, and keep all seams centered and vertical.  

Pinning out the ease at the princess seam
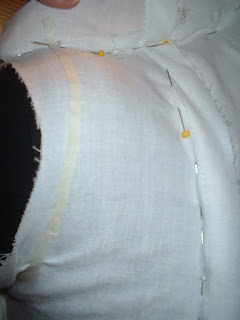
Pinning under the bust for an exact shape

cleavage darts at center front
 3. Pin out the dart space between the breasts, creating a made-for-you cleavage. You may also need to add a dart in the back near the scapula, angling into the arm hole to accommodate the curve of the back.

Pinning the front
4. Continually evaluate. Look for ripples and drag lines that need to be stretched and pinned out.


Pinning the shoulder and marking the armscye


5.. After everything is snug and firm, the last thing to do is mark the armscye and the neckline. I used 1/4" masking tape (available in the quilting section of your fabric store) because I could visually see it better, remove and reposition it if necessary.

6. Mark the back seam line on both sides with a pencil or marker and then remove the cover.

Step Three: Mark the Seam Lines
 All those pin lines now need to be marked and transferred to the pattern. Transferring the new markings to your cover pattern are optional, but what if you needed to make a new cover for your mannequin? What are the options?
- Go through this fitting process and re-pad your mannequin again. 
- Remove the cover and cut a new one from the original. 
- Use the old one no matter the condition.
I recommend it, but if you'd rather do it the quick and dirty way, go ahead and sew up the cover using the pins as your seam line guides and call it done.If you want to transfer your new seam lines to your pattern, and perfect your cover to make sure that both sides will be the same, then read on:

1. With a pencil, mark the pin lines on the cover just as you made them. Don't worry that they might be crooked or angled. I did mine like a dash, marking exactly over the pin.

Mark the corrected seam line with a colored pencil
2. To copy the new seam lines to the pattern, take the cover apart by removing the stitches. Now you have two sides, both marked, and neither are exactly the same. You'll have to evaluate both and decide which will be more accurate, or if you need to use a combination of both. Granted, this is not an easy task, nor is one right and the other wrong, but each will have its own consequences. Any education and experience you have will help you, but all the same, this is a decision that you must make.

3. Having the new markings visible, pin the pattern and cover back together. Use a tracing wheel to trace along the new seam lines, perforating the paper below.

3. Remove the cover from the pattern and remark the pattern seam lines following the perforation. I also reduced my seam allowance to 3/8" along many, but not all seam lines.


Mark the new seam lines and reduce the cut line

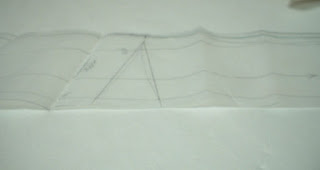
If you like, this is the time to mathematically check the dimensions. My darts, which were originally straight, are now changed to a curve to match the body's shape.

Straight darts are now curved

4. Press out the original cover fabric, putting like pattern parts together, and re-pin the newly adjusted pattern to it, cutting to the new adjusted size. Sew it together once again, leaving the center back open.

  Step Four: Time for a Second Fitting

1. I decided it was best to do a second fitting just to be sure that everything was perfect. This fitting went much quicker. Wear the same under clothing as last time.

There were only a few adjustments needed. 


My model didn't leave her bra on, so I ignored the bust area and made no changes there.


Again, make these changes to your pattern and cover. 
It may help you to take photos of yourself pinned into your cover, both front, back and also a side view. This could help to make a duplicate of yourself in Part 3 of this tutorial: Padding out the mannequin.

Tuesday, November 22, 2011

Copy your Figure: A Dressform Tutorial part 1

This post is a follow up to my January post about various commercial dress forms and DIY methods sewists use to try to get a decent dress form. Though it's been a while, I didn't forget my promise to write a tutorial to make THE BEST mannequin that really does duplicate your figure. In my defense, I just finished mine in September, (though I admit I've been using it anyway, pins and all) so thank you for your patience. To keep this tutorial from growing into an unmanageable mess, I'm going to break it down into smaller parts.


The key to success is in the accurate making and fitting of a french lining or Moulage, which is a sloper, master pattern, or fitting shell  that has all of the wearing ease removed. Because this lining will become the cover of your mannequin, from here on out, I'm going to just call it a cover. 

Supplies you will need:


~ A fitting shell pattern of your choice
~ Quality 100% cotton muslin yardage- the best you can afford. DO NOT PRESHRINK! 2 yards will be plenty.
~ A sturdy mannequin- smaller than your own figure measurements
~ measuring tape
~ clean spray bottle
~ 100% cotton batting
~ various rulers both curved and grid- C-thru
~ soutache braid
~ thread
~ pencil
~ scissors
~ disappearing fabric marker
~ dressmakers carbon- I prefer the waxed type
~ tracing wheel
~ dressmakers pins
~ hand sewing needles
~ sewing machine
~ Paper for copying your pattern- Use tracing paper on a roll, usually 12-24" wide found in the art section of your craft store(If you need wider paper, tape two sections together with transparent tape). While you could skip over the copying of your pattern, remember that a final pattern of your cover will come in handy if you ever need to make a new cover for your mannequin without going through the fitting process again.

Step One: Prepare the Pattern

1. Start with a Master Pattern that you like
The only pattern pieces you will be needing are the bodice and the skirt, both front and back. Be aware that I am not endorsing ANY of these patterns. I list them only as possible sources.
Comercial Pattern Sources:
Butterick 6092
Vogue 1004
Specialty Sources:  
http://pattern.stringcodes.com/main_basic.html
http://www.surefitdesigns.com/

From BurdaStyle:
Free Download:
http://www.burdastyle.com/blog/basic-sloper-patterns-priceless
OR http://www.burdastyle.com/patterns/basic-one-piece-dress-sloper (It can be both an advantage and disadvantage to be without the waist seam- I prefer to have a waist seam to fit to).
Draft Your Own:
http://www.burdastyle.com/techniques/constructing-the-basic-bodice-block

http://www.burdastyle.com/techniques/drafting-the-basic-skirt
.
2. From Bodice with darts to Bodice with princess seams: FRONT.
If you are using a princess seam pattern then skip this section on dart mannipulation. It's also important to mention that you should ALWAYS use a ruler to trace. If you do this freehand, your work will not be so accurate.

If your pattern does not have a seam line marked, use a ruler to mark this line on your pattern. Carefully trace off your pattern pieces, tracing only along the seam line.  This is the important line to know, and at this point, we don't care where the cut line is. If your bodice has two darts, manipulate the side dart to the shoulder to make it a princess seam.

Here is a good video on You Tube that shows how to do that:
http://www.youtube.com/watch?v=pwTv7bBN7XE .

Use a ruler to connect the two darts from the shoulder to the waist. My pattern has only one dart at the waist, so I used a curved ruler to mark an attractive princess line to the shoulder.

Now we need to actually divide the bodice into two pieces by tracing off the two sides:  Start at the neckline, down the center front, squaring off at the waist, up the inside leg of the waist dart to the shoulder, across the shoulder and neck to the center front.  Add a grain line parallel to center front, label your pattern and add a notch or two if you desire. Do the same to the side front, carefully tracing around the outside leg (farthest from center front) of the darts, shoulder, waist and side seam. Add notches (if any) in identical locations to match up with front pattern, grain line parallel to center front and label. Now add a 1" seam allowance around both pattern pieces, transferring the notches to the cut line.

3. From Bodice with darts to Bodice with princess seams: BACK
On the back bodice, draw a slightly curved line from the shoulder dart to the waist dart. This line will be come your princess seam line. Copy off the Center Back and Side Back pattern pieces the same as the front, adding a grain line parallel to the center back, labeling, notches if desired, and 1" seam allowances.

4. Give your skirt pattern princess seams too!
Measuring from the waistline down center front and back, perpendicular to the grain line, shorten the skirt pieces to about 16-17". Be sure to "walk" the pattern side seams to make sure the front and back are shortened the same amount.

Draw a line from the inside dart tip to the hem. Make this line perpendicular to the center front and back. This is your princess seam sewing line. If your pattern has a second dart, you can leave it as is, allowing one more fitting element, or combine it by transfering that dart space to the dart closest to the center front. Trace off your skirt pattern pieces as before, adding  a 1" seam allowance and  labeling them skirt front, skirt side front, skirt back, and skirt side back.

Step Two: Layout , Cut, and Sew

1. Layout
Lay out your pattern as you normally would with the pattern grain line parallel to the selvage. Cut 2 of each pattern piece.  I pin on the inside of my seam line rather than on the edges, and because I want my seams to be ultra-accurate, I use dressmakers carbon and a tracing wheel to mark the seam line.


2. Pin along seam lines. Sew it up with a basting stitch. Press lightly or not at all. 
Carefully match the seam lines using a pin in the mark on both front and back to hold the seam together. 


The sewing order:

First, sew the bodice and skirt together matching bodice front to skirt front, bodice side front to skirt side front and so forth, sewing at the waistline.

Second, sew the princess seams, matching fronts to side fronts and backs to side backs, matching any notches and waist seams.


Third, sew shoulders and center front. I left my side seams open because that is where the much of the fitting adjustments will be needed, and the back so that the model can get it on.


Here is my pre-padding mannequin wearing the cover I just made with the side seams pinned together. The cover still has the wearing ease, but you can see that the mannequin is smaller, especially in the hip area. The princess lines are also in the right location, centering over the shoulder and bust points.

Friday, January 21, 2011

Making the Case for a Dress Form

I am not automatically a proponent for sewing gadgets. First, it has to prove its usefulness to me. Gadgets and tools cannot take the place of technique - like a good screw driver, it can make the job easier, but will never replace the need for practice and knowledge. The more expensive the tool, the more need for establishing its worthiness to my life and budget.

In making the case for a dress form, the best ones will cost hundreds to thousands of dollars, and the personal dress forms are a whole lot of trouble to make, so it's a decision that can't be made lightly.
I've draped a new design idea. Looks great!
First ask yourself, what will I use it for? Why do I want it? I use my dress form now in ways that I never needed before college. I use it to test a new design idea. Like at the fabric store, I drape my mannequin with a quick drape to see how the fabric and style idea will go together.

I had to drape the sash on this design I call Espire.
I use my mannequin during the pattern making stage to check things like the flare of the skirt, the gathering of a drape, or the depth of a neckline.

While I sew the new style together, I keep the garment and cut pieces pinned to the mannequin so that it's ever present in my mind and in my view. It's the designer "instinct" that can flag my conscience if something isn't working as expected. In this way I have a another chance to nix or improve a bad idea during this stage of the development.

If the style demands it, I need to use a mannequin to drape the pattern for part or portions of a new design style, as in the hip drape on this red dress I call Espire.


I consider a mannequin invaluable. I own two: one is a Styrofoam in size 6, and the other is my base size 10 in paper maché from dress rite. I use them both equally. But for all the things I do use them for, what you might notice is that I don't use a mannequin for fit. Why not? Because a dress form represents the body of everyone, yet no one. To check fit, I use a real person, a fit model. I talk about that in one of my earlier posts. To use a mannequin for fit, it would have to be a near perfect representation a real body, and even if it did match the measurements and body type I needed, it would still have limitations.

Many manufacturers have tried to produce mannequins that dress makers can use to help with fit. Probably one of the most common is the dial form. You are able to adjust the sides, bust, and back as necessary using the dials. I've never tried to use one of these, but it looks like guess work, and seems like it would be hard to duplicate bodies with a rounded shoulders, large abdomen, or a swayed back.
Another type of adjustable form is like the small Styrofoam form I have. It came with pads and a cover to keep the pads in place. No matter how I tried, I could not pad the form to match a real body, or lengthen the back waist enough. The shoulders are incredibly wide too. No chance of making those smaller.
Using paper tape
For Do-It-Yourselfers, it's popular these days to make a copy of your body by wrapping yourself very carefully in paper mailing tape or duct tape. The idea is that you wear a long t-shirt, knit dress, or garbage bag and have a buddy tape you up with a few layers from neck to hip. There are numerous posts from people who have tried this, so getting the directions isn't a problem using google. What is a problem is that the end result isn't very accurate, it's unpinnable, and they actually add inches to your figure that aren't there! I have tried both of these methods and was not very satisfied with either.

A more accurate method for do-it-yourselfers is to wrap yourself in a plaster cast (like a medical cast for a broken arm) and then fill the cured form with spray foam. Remove the cast, and voila! You have an actual body duplicate that will take a pin and can be marked with waist and seamlines. There are instructions on the internet from a company that sells kits and will do this for you if you want. Check out My Twin Dressform if you are interested. (NOTE: Even though I make this method sound really easy- it's not. Plaster hardens very fast, requires special cutting tools to remove, and can be dangerous to children who might want to play in it. When so encased in plaster, fainting is a real possibility. Please, do not take lightly using this method for making a dress form!)

Saving the best method for last, a very safe, and very accurate method to get yourself a body double is to sew yourself a princess seam moulage or french lining which is a fitted sloper or master pattern with no ease. Pad any suitable mannequin (smaller than your actual measurements) that you may have to fit the moulage. This method requires no long calculations, only a helper. I'm going to do this with my fit model next week, and will leave you with photos and instructions hereafter. Stay tuned!

These posts are now published.Click below to read Copy your Figure:
Part 1
Part 2
Part 3