

Part 3 of this tutorial shows how to pad out your mannequin to fit your cover along with all the finishing details. Listed here are all three parts of this tutorial:
*9-14-12 update: Dress Rite no longer sells full size mannequins. They sell 1/2 scale mannequins now. Sew True sells several kinds of mannequins, professional and "dial" type forms at a reasonable price.
Step One: Pad out with 100% Cotton Batting
You will want to begin with the area that needs the most padding. I began by wrapping midriff, waist, and hip because I knew that these areas would be several inches too small and I would need a bigger base before beginning the precision padding. To do this, I used narrow strips just wide enough to get around the shape with minimal overlap and no gaping. I wrapped in a complete circle about 3/4 times, keeping the batting as tight as I could get it. I used straight pins to keep some areas snug, (but removed them before finalizing the shape). Once the base is good and even all over, it's time for the next step:
Step Two: Precision Padding
Put the cover on the mannequin, pinning the back closed. Step back to see where the figure needs filling out. I identify an area, and start filling in using shapes, such as rectangles, triangles, circles or any odd shape that will fit the section. Begin layering in graduated sizes that will fill in the area to get the desired effect.
 |
| Padding the hip curve with graduating rectangles |
 | ||
| Padding out the tummy area |
 |
| Fill in what will become the buttocks |
I begin at the shoulders and work my way down the torso, continually replacing and removing the cover to add padding and check the tautness and smoothness as I go.
 |
| Make a silhouette comparison |
Keep in mind the silhouette of the figure that you are copying. How much tummy to give? Where to tapper? Are the hips rounded with a larger tummy, or is the hip area more wide and narrow with a flat tummy? Once the silhouette is correct, MEASURE the mannequin to make sure that it matches your measurements in the same places.
Step Three: Finishing Touches
Finish up the mannequin by hand stitching the back closed. To add a neck, I used bias strips and hand stitched it in place. I made an armhole cover like this one:
 | ||
| I basted the circle, pressed it under. Now it's ready to stitch in place. |
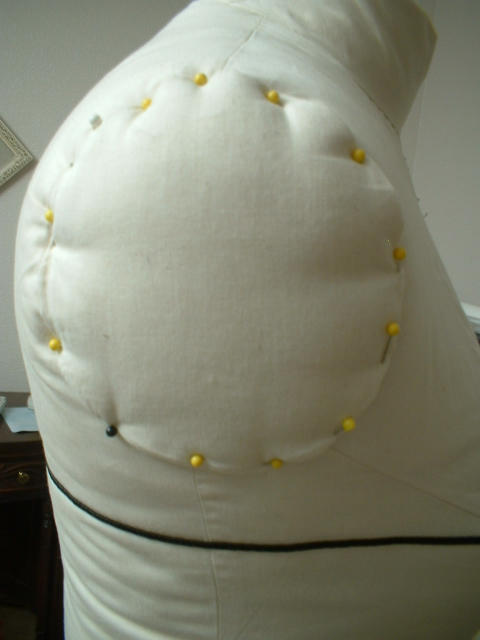 | ||||||||||
| Added a few layers of batting cut into a circle, pinned the cover over it. It's ready to stitch. |
I also added soutache in black to mark the bust, waist, hip and center front of my mannequin.

One day I will add a jewel neckline to it.
Step Four: Shrink it Up
Once it's all stitched up, spray the mannequin nice and damp with clean water. Let it dry overnight, or better yet, use a hair dryer on it. The idea is to shrink the fabric, as cotton fabric will do, so that the cover will be nice and tight as a drum.
Whew! That was a lot of work, but well worth the trouble for those of us who use a mannequin, which I do, EVERY single day. Let me know if you use this tutorial to make your own mannequin. I'd like to know that it was helpful to someone.
I'm just surfing from A sewing Odyssey and clicked on your blog. How opportune for me. Right when I am seriously ready to make a 'dummy' out of duct tape you have the much better tutorial for me.
ReplyDeleteThank you.
This is a wonderful set of posts. I will be do my own body form in January...Thanks so much for sharing.
ReplyDeleteMaria
Thank you so much. I plan to use your method, once I lose some weight and my sewing friends is done with chemo.
ReplyDeleteDoing the finishing touches, I am so happy you posted this and even more happy to be almost done! :) Putting each contouring level (? whatever you want to call it) on my hips and bottom was all the motivation I needed to keep my eating choices balanced and reasonable this holiday! :) haha perfect timing! But seriously, so glad you wrote this, and so glad I stumbled upon it. :)
ReplyDeleteThe clearest, best tutorial out there for this type of form. I have been reading up a lot as I plan to do this soon and you have really inspired me. Thanks. I will buy my muslin this week.
ReplyDeleteThis looks AMAZING! And it looks like it would do well when corseted, as well, which is a big factor for me since I do historical garments as well.. Do you think it would "squish" enough while still maintaining a shape?
ReplyDeleteGreat tutorial! I have a dressform with dials, but have never been able to get it exact. So going to do this!
ReplyDeleteThank you soooo much for this totu and all the details ! I've had this project in mind for some time, and I sure feel more confident after reading your blog !!
ReplyDeleteThis looks so much more useable than the duct tape version I made a while ago. Great instructions - evrrything makes sense!
ReplyDeleteThanks for your clear instructions and best of all the great photos. I just purchased for around $90.00-shipping included a dress form with jersey cover, pin-able, wooden base and neck from a store supply warehouse in Missouri-size 8 so know I'll need to pad it to duplicate my size 14-16 self. Thanks so very much!
ReplyDeleteThank you very much for your clear instructions. I have made my 'body double' and the result is truly amazing! Thank you
ReplyDeleteMannequin just arrived, batting at the ready, I cannot wait to get started. Thank you for your tutorial, fed up with endless trying things on and amending, this should help no end. Thank you.
ReplyDeleteFound this so useful! I'm going on a costume course next year and have no experience in draping. I have an adjustable mannequin but it's less busty and shorter than me, so this is definitely on my to do list! Will let you know when I complete this, and it'll be over at my blog Toni Sews Clothes.
ReplyDeletehttp://tonisewsclothes.blogspot.co.uk
I'm gearing up to do this again with M'damn. I keep changing sizes, and I'm sewing for my sister as well. I will be attaching the padding to the cover, and putting in a zip up the side (so the back neckline stays smooth). The shrink-it-up part of the advice here is priceless!
ReplyDeleteThis is the perfect tutorial to fit a dress form to my size! Thank you so much for posting!
ReplyDeleteHello, I just want to say I love how you did this and thanks for taking the time to explain in detail. I have done something similar, but it's not quite to the quality that yours is and you have inspired me not to give up on the project. Thanks
ReplyDeleteI could not resist commenting. Well written!
ReplyDeleteThank you so much! Since the purchase price for dress forms are the same as the rent for an apartment in the city here in South Africa, i'll DEFINITELY be using this! Best tutorial yet!
ReplyDeleteI did a plaster of paris dressform. My husband wrapped me up in plaster bandages. He was a great helper, actually. He helped me fill it with foam and made the stand for me. We had a few issues with it. The foam took forever to dry. Anyway, it came out pretty good. The only think is that it isn't squishy. So I might try your method with my Dritz form for the squishy projects.
ReplyDeleteThis is a fantastic website and I can not recommend you guys enough. Quantity Surveying
ReplyDelete