Tuesday, August 25, 2015

Sewing Pattern Variations: Pendleton Dress


One of the many things I love about sewing is the customization. We all get more value from our patterns when we can change it up and make them more than once. What girl can’t use a few extra outfits?! 

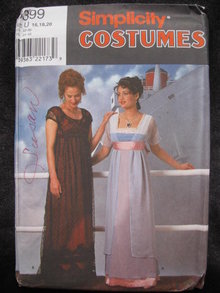
However, the pattern cover can be deceiving. With limited time and space - and to keep it to the point (but cute and appealing) - we must choose only a few "looks" to show it off. 

Ideas don't spring from nowhere, so a few more photos really helps. You may have seen these before ;-)
VIEW A in Chambray and Pique
VIEW A in Houndstooth and Velveteen


VIEW B in a cotton floral print

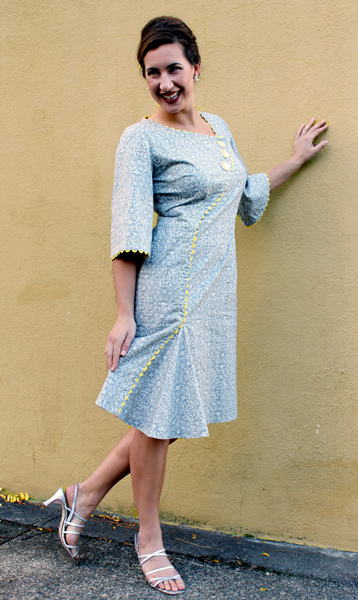
Today I'm sharing a Pendleton variation that is casual and fun, something more than the straight-up version on the package. None of these options require altering the pattern or any special skills, but hopefully it will get you thinking about your own variations.


The changes I made:
  •  3 buttons following the front instead of a bow
  •  rick rack versus piping
  • omit the elastic from the bell sleeve (add a facing)
  • back zipper instead of side zipper

My fabric is a comfortable (pre-washed) cotton that is a bit thicker than the other versions shown above. This is great for the bell sleeve because it helps hold the pretty shape and gives a little more structure to the dress too. 


My adventure got started with the gray fabric in my stash of course, but the fun didn't get started until I found these adorable buttons a the store. They deserve to be a focal point.

 The rick rack came next. There are three widths of rick-rack, and this one is the Jumbo size. Centering the rick rack down the seam allowance is made easier by basting the seam on the dress first. The thread leaves a trail to follow so to speak. Lift the rick rack at intervals to center it along the basting while basting to the dress. This photo shows the finished front.

 Making View B without the collar, there is the option of changing the zipper from the side seam to the center back. Simply mark the zipper length on your dress and sew a centered zipper instead of a lapped zipper.


Leave out the elastic on the View B sleeve and it takes on the lovely bell shape. To add the rick rack to the sleeve edge, I needed to make a facing of course, and then top stitched everything in place with the top stitching thread to add the same dash of color. Use top stitching thread for the upper spool only. I use standard thread for the bobbin. You may need to play with the tension a little bit too.
From cute to colorized in 4 easy steps. What do you think?  Shop for this pattern here:
http://www.sewchicpatterns.com/pendleton.html

Have a great sewing day!


Thursday, August 6, 2015

ASG Conference 2015 San Diego review

ASG Conference - What a Weekend!

I wore this outfit in the Saturday Fashion Show

My booth!
I recently returned from the American Sewing Guild Conference in sun-drenched San Diego. It was a busy few days, filled with workshops, lectures and fashion. Some of my favorite things had nothing to do with vintage, and that's partly why I go to this type of event -- to mix and mingle with craftspeople who have found their own niche. It's great to share our experiences and learn from each other!


Southern Belle, Simplicity #1061 poster and Tia on display.
Andrea hand painted the flowers on her jumpsuit
I met so many great people!


At the fashion show, Andrea Schewe pulled me aside and said "Is your name Lauren?" (An easy mistake, right?) She was looking for someone her sister asked her to meet. So it turns out I wasn't the right "Lauren" but we discovered our common thread as Simplicity designers, and she is such an easy lady to like!

Here I am with Andrea, costume pattern designer extraordinaire at Simplicity. I learned she has been working for them for 30 years!  Recall those Titanic dresses that we all fell in love with? Yup, she's the one.  I still have my pattern too! Follow Andrea's blog here: http://www.andreaschewedesign.com/blog


You need to know about Bobbi Bullard. She is an embroidery designer and now she has a new way to teach kids (or anyone) to sew. She has started the Kids Sewing Studio, offering sewing classes for every age and ability, but what caught my eye was this idea of making a complete sewing class in a box! She has projects for the absolute beginner and for those with basic skills and they are so reasonably priced at $30. This is a great way to get started!

Bobbi Bullard and her friendly helpers.

No more excuses!

My next-door booth neighbors are talented bead jewelry designers from the San Diego Bead Society. It was so fun to exchange ideas and get to know them.They became one of our best customers, and hear this -- they don't even sew! I told them about the Simplicity 1061 sew along and they promised to join in.


Check out these amazing necklaces made by some of the members:

This award-winning bead necklace takes "statement" to a new level!

This necklace was made from vintage buttons


Meeting Diana Cavagnaro (dianacavagnaro.com) was amazing. She creates one-of-a-kind custom chic hats -- worn at the Kentucky Derby and by many celebrities. She also teaches millinery (hat making), has written many articles about her craft, and volunteered for years with the American Cancer Society. In fact, she was responsible for creating and donating more than 2,000 hats to cancer patients. I loved seeing her gorgeous creations and learning a little about the life of a hat-designer to the stars, and so much more! 

A few of Diana's millinery videos.
Diana and her talented staff!


I also met another designer I now admire. Julianne Bramson was one of the founders of the vintage reproduction line "Decades of Fashion." To start that line of patterns she said she bought about $10,000 in vintage patterns! She is now co-owner of Fashion in Harmony following her love for the 1930's bias cut in a modern way. This accomplished lady specializes in everything bias cut! In fact, she co-authored a book Bias Cut Blueprints that takes you from picking the right fabric, teaching a fun-to-sew method of bias cut clothing and customizing your piece, and, maybe most important, getting a great fit.
Julianne Bramson, from Fashion in Harmony
We spent a lot of time chatting and ended up trading patterns. It's so fun to meet someone who really loves what she does and is sharing her expertise with the rest of us. If you love the look of bias cut,  I recommend you check out her website and her book!

 It was a very very busy few weeks leading up to this event and the three days I was in San Diego flew by, but I had a great time and met some fabulous people. Thanks to all of you for being some of the highlights my weekend!

Until we meet again have a great sewing, designing or beading day!

Laura

Saturday, August 1, 2015

Tutorial: How to Sew a Side Seam Pocket

With the exception of the Simplicity 1061 sew along (which I am neck deep in the middle of), it's been a while since I've posted a tutorial so I figured it was time to address our baggage needs. We all carry a cell phone these days and where to put it is always the question. My bra, at least, was not made to take care of this need, so why not put pockets in everything? No more undressing to answer a phone call! I like that.

As part of the sew along, I've made a pocket pattern to go into our skirt.


1. Down load the pattern by clicking on link below. Cut 2 from contrasting or fashion fabric. Though not as strong, you may choose to use lining fabric too. Being limited by page size, this pattern and opening are small, but big enough to house your phone. If you'd like to enlarge your pattern, lengthen the pattern about 1 inch below the notch.

Find the full size pocket pattern on this page:

https://sewchicpatterns.com/free/


2. With right sides together, pin the pocket to skirt front and back at the right side seam. Remember that the left side seam has the zipper, so only one pocket on this project.


3. Sew to side seam using a 3/8" seam allowance

4. Press pocket and seam to outside.

5. With front and back side seams and pocket edge matching, sew as directed on the photo. 

6. Press pocket to skirt front. Baste at upper edge. Complete your skirt as directed in the guide.