

Part 3 of this tutorial shows how to pad out your mannequin to fit your cover along with all the finishing details. Listed here are all three parts of this tutorial:
*9-14-12 update: Dress Rite no longer sells full size mannequins. They sell 1/2 scale mannequins now. Sew True sells several kinds of mannequins, professional and "dial" type forms at a reasonable price.
Step One: Pad out with 100% Cotton Batting
You will want to begin with the area that needs the most padding. I began by wrapping midriff, waist, and hip because I knew that these areas would be several inches too small and I would need a bigger base before beginning the precision padding. To do this, I used narrow strips just wide enough to get around the shape with minimal overlap and no gaping. I wrapped in a complete circle about 3/4 times, keeping the batting as tight as I could get it. I used straight pins to keep some areas snug, (but removed them before finalizing the shape). Once the base is good and even all over, it's time for the next step:
Step Two: Precision Padding
Put the cover on the mannequin, pinning the back closed. Step back to see where the figure needs filling out. I identify an area, and start filling in using shapes, such as rectangles, triangles, circles or any odd shape that will fit the section. Begin layering in graduated sizes that will fill in the area to get the desired effect.
 |
| Padding the hip curve with graduating rectangles |
 | ||
| Padding out the tummy area |
 |
| Fill in what will become the buttocks |
I begin at the shoulders and work my way down the torso, continually replacing and removing the cover to add padding and check the tautness and smoothness as I go.
 |
| Make a silhouette comparison |
Keep in mind the silhouette of the figure that you are copying. How much tummy to give? Where to tapper? Are the hips rounded with a larger tummy, or is the hip area more wide and narrow with a flat tummy? Once the silhouette is correct, MEASURE the mannequin to make sure that it matches your measurements in the same places.
Step Three: Finishing Touches
Finish up the mannequin by hand stitching the back closed. To add a neck, I used bias strips and hand stitched it in place. I made an armhole cover like this one:
 | ||
| I basted the circle, pressed it under. Now it's ready to stitch in place. |
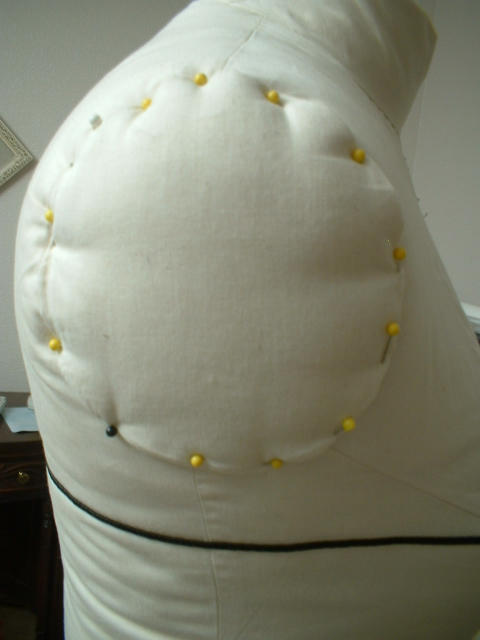 | ||||||||||
| Added a few layers of batting cut into a circle, pinned the cover over it. It's ready to stitch. |
I also added soutache in black to mark the bust, waist, hip and center front of my mannequin.

One day I will add a jewel neckline to it.
Step Four: Shrink it Up
Once it's all stitched up, spray the mannequin nice and damp with clean water. Let it dry overnight, or better yet, use a hair dryer on it. The idea is to shrink the fabric, as cotton fabric will do, so that the cover will be nice and tight as a drum.
Whew! That was a lot of work, but well worth the trouble for those of us who use a mannequin, which I do, EVERY single day. Let me know if you use this tutorial to make your own mannequin. I'd like to know that it was helpful to someone.