Saturday, June 7, 2014

Honorable Mention: Stephanie Ghidossi

The "Party Like a Rock Star" was the name of the sewing and design challenge this year hosted by the Independent Pattern Company Alliance, sponsored by these nine pattern companies:


Voting through the IPCA facebook page for the "People's Choice" award for each company has just closed. Winners will be announced in just a few days, on June 10. Winners will receive $100 in product from their sponsoring company, and go on to compete for grand prizes donated by Coats, Reliable, and Babylock. 

I received a total of 5 entries for this contest. I was impressed with the quality and creativity of the entries, but only 2 photos were required, and that doesn't always tell the whole story. Because it was a very manageable number, I asked all contestants to send me their garments. Only 3 could become semi-finalists, but I knew that every entry deserved our attention, so I spent an afternoon taking photos so that I could show you the workmanship and detail in a uniform way. For the next month I'm going to share these entries with you, along with any comments that the contestant may have given me to share.  


Honorable Mention: Stephanie Ghidossi

Stephanie did a beautiful job re-inventing the Valentine Slip view B,  #LN1207. She said that "Burning Man" was her inspiration. Stephanie paired three different fabrics, pleather, charmeuse, and chiffon to create this completely reversible design. She did a great job of incorporating the peacock design of the fabric, and invented a really clever way of lacing the ribbon. I didn't dare untie it for fear I would not be able to put it back. Stephanie has been sewing for only 3 years! Enjoy!


 Her design was based on this pattern:
Get your pattern here: http://www.sewchicpatterns.com/valentine.html

Tuesday, June 3, 2014

Sewing Indie Month- Enter to Win!


Tomorrow (June 4) the last day to post your creations and enter to win a whole boat load of prizes. If you have completed a Sew Chic pattern (or from any of the sponsoring designers) this month (May 1-June 4), all you need do is post the project photo somewhere on the web- in a blog post (of your own, or even a friend!), on patternreview, or Kollabora (maybe pinterest and photobucket don't count?). Align it with one of these categories and link your project back to the post of the category leader:

Dressed to the Nines (Formal wear)
Laura of Lilacs and Lace


Everyday Casual (Casual wear)
Jenny of Cashmerette

An indie Love Affair (two or more patterns combined)
Wanett of Sown Brooklyn 


Patternhacking (reworking a single pattern)
Rhonda of Rhonda's Creative Life


Click the links above to see the entries so far. Dressed to the Nines and Indie Love Affair have the fewest entries (11 and 8). It's disappointing that there are no entries to represent Sew Chic, but I'll keep my fingers crossed. There is still time!

Thursday, May 29, 2014

Ana Stepalica and Rhonda Buss

 This is my lucky week! Today I get attention from Ana of Stepalica Patterns; she has published an interview with me that we did some time ago, AND today, Rhonda begins her "hack" of the Myrtlewood pattern. Links following, but so as to not distract you just yet, let me tell you just a little about my experience with Ana.

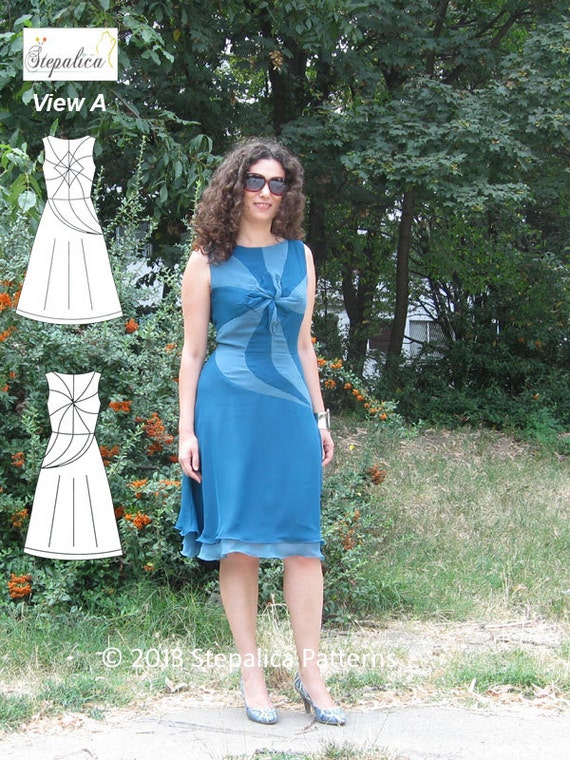
For Sewing Indie, we all saw a list of participating designers and was asked to choose 3 or 4 companies that we wanted to work with. I did not know any of the designers personally, and some of them were so brand new they had just barely published their first pattern. We knew that we would not necessarily be paired with those on our list (they had to choose us too!), but lucky for me, the one designer that I chose that picked me also was Ana Stepalica of Stepalica patterns. Let me tell you why she was one of my picks.


Without knowing anything else, here is what this design (her first) told me about Ana:
  • Jumping right in to the advanced sewing market (which is a small sector), we know she is brave and has no fear. Even I was not willing to do that!
  • The complexity of the design tells us that she has skill and is detail oriented.
  • This fabric is not easy to work with. She is patient and careful- even exacting.
  • The tried and true classic silhouette is timeless and traditional yet...
  • not boring. She is cleaver, creative, and innovative.
  • The look is very international- it turns out she is from Serbia.
These are all the things that are important to me also, and immediately I feel a kinship with her. At that time, I did not know that she is also a writer for Sew News Magazine. She writes, she sews, she's creative. Sound like a winning combination for a pattern company to me! Now that I've had a chance to get to know Ana, I KNOW she is all of these things and so much more!

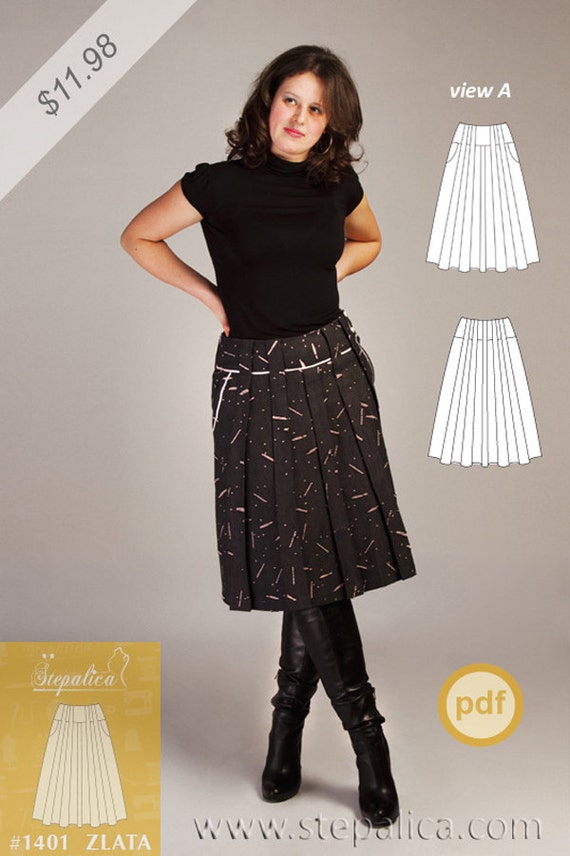
The prices of her downloadable patterns are very reasonable too. I love her Zlata skirt! Take a look at what Rhonda Buss of Rhonda's Creative Life did with this skirt:


Read more about her making of this skirt here:
http://rhondabuss.blogspot.com/2014/05/sewing-indie-month-pattern-hacking_23.html

This week Rhonda has begun her "hack" of the Myrtlewood pattern:
 It's proving to be VERY interesting. She's got my attention! 

And of course, you don't want to miss Ana's interview with me.
 
It's your reading list for the week.


Sunday, May 25, 2014

Sewing Indie with Craftsy: Flirty Meets Sassy, Part II

For Sewing Indie Month my assignment was to pair up with Christine Haynes (patterns) who is also a Craftsy class teacher...

 Craftsy.coom

Craftsy.com 

So I decided that my tutorial would combine our projects into ONE adorable outfit that YOU can make for yourself!
Sew Chic Patterns Tia 1312

With a few quick pattern changes, I've turned Miss Sassy into a short jacket.

Sew Chic Patterns Tia 1312
And Miss Flirty got a make over too.

Sew Chic Patterns Tia 1312

I raised the neckline, changed the trim to mirror the collar on the jacket, added tucks down the front, highlighted by covered buttons.


Sew Chic Patterns Tia 1312

 I even added cross tucks to the pocket to continue the theme.

Sew Chic Patterns Tia 1312
You can find the jacket tutorial here:
Sewing Indie with Craftsy: Flirty Meets Sassy, Part I 
But stay right here for the Tia Dress tutorial, so here we go!

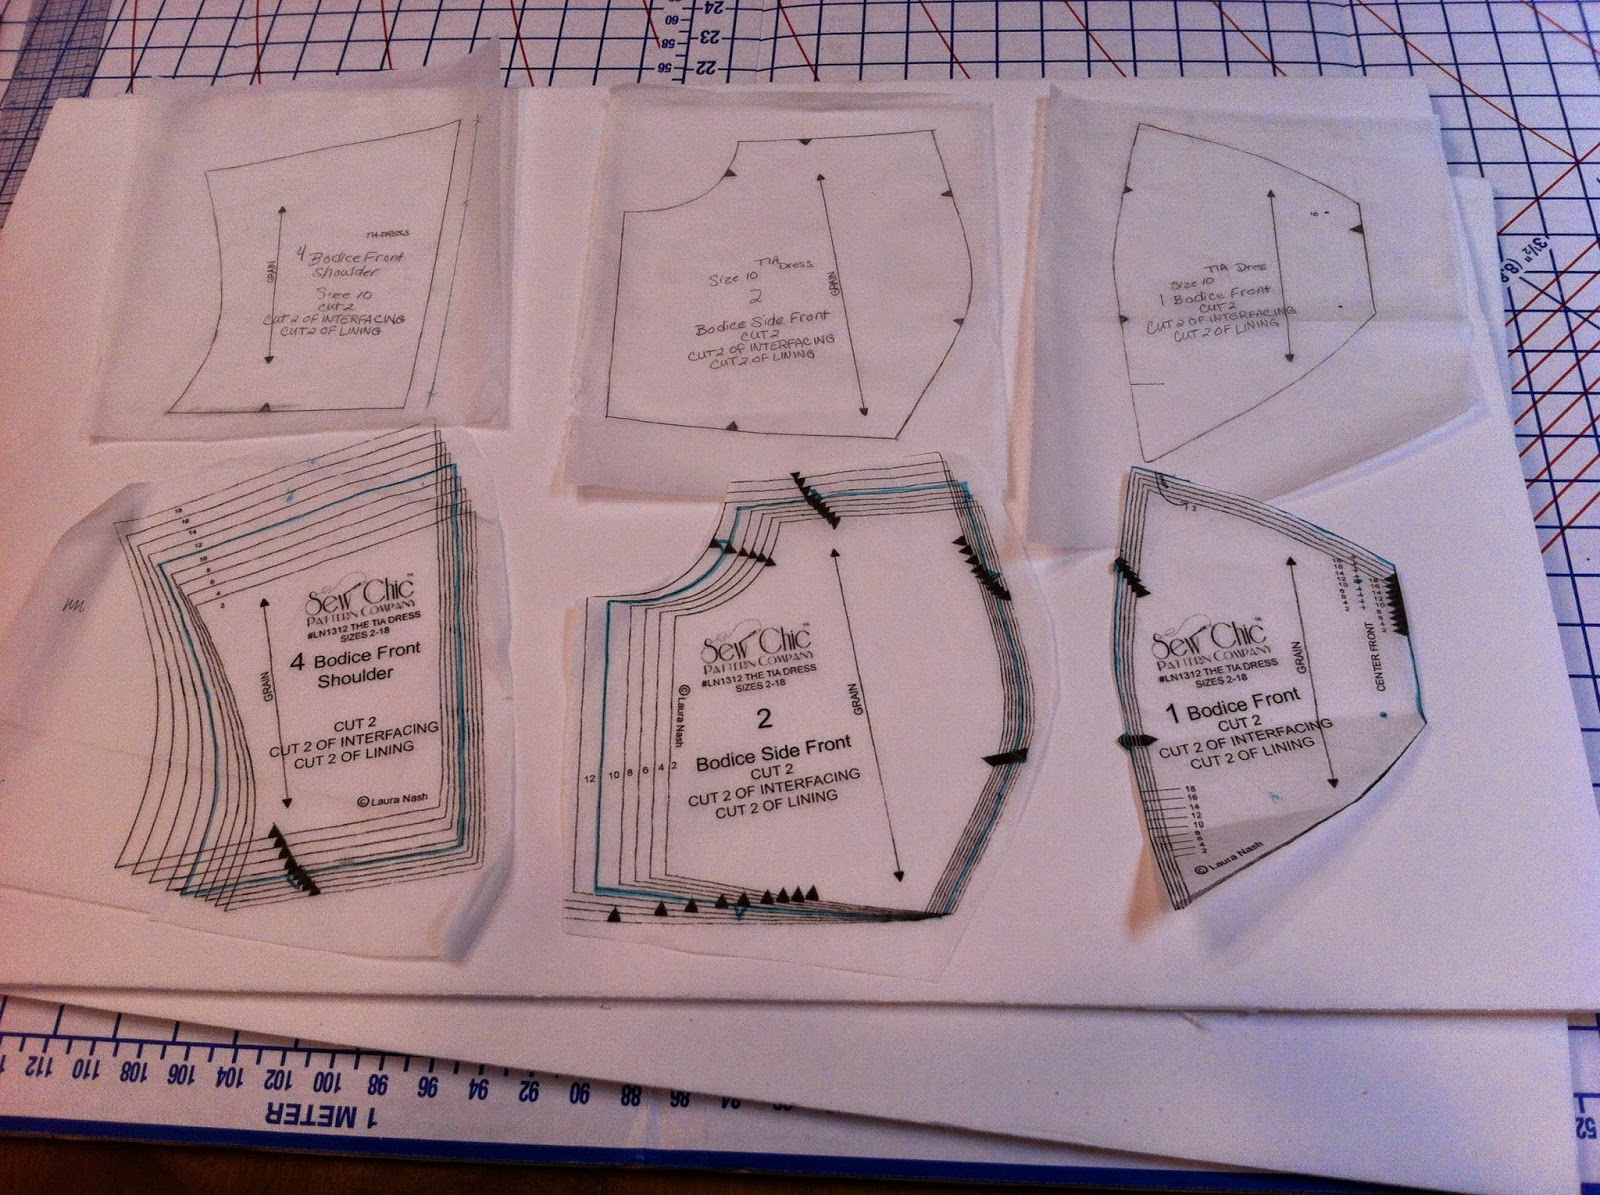
First we are going to raise the neckline. Whenever you want to make an alteration from the original pattern, I recommend that you first trace off the pattern piece in your size. If you make a mess of it, no problem. You can always come back to the original and try it again!

Here are my pieces traced off. Next, mark the seam allowances around the neckline. And pin them together as if sewn, leaving the bottom of the princess seam spread out.


Use a grid ruler to draw in a new cut line. I'm going to raise my neckline 5/8" and flattened that top curve just a little, raising the center to about 3/4".  For more modesty, you can raise the neck more, and flatten the curve or go straight across for a square neckline.


What was the cut line, now becomes the sewing or seam line (easy for me!). I've extended the pattern cut lines for all pieces and shortened the shoulder piece to match with my new seam line.
This is what my new pattern pieces look like. Be sure to make a notation on your pattern so that you will remember what you did when you find this pattern again years from now! Next, I want to add pleats down the front at the same interval and depth as my jacket pattern.

Rather than cut my pattern up to add the tucks permanently, I'm going to make the tucks first, then cut the pattern. This is a great way to add may kinds of details and get them positioned exactly. Using a small square of fabric large enough for my pattern and the wide enough for the tucks, I've marked the edges of my fabric with chalk so you can see it, but normally I would just make a clip with my scissors. These marks are 1 3/8" apart from each other. I've left about 1 1/2 to the selvage. Be sure that your tuck marks follow the grain!

Fold the pleats along the marks and press. Your grain will keep these perfectly straight. Now sew your tucks at 3/8" from the fold line.

To keep these tucks straight, use a guide, not your eye, or a piece of tape. Cutting 2, one set of tucks will be pressed to the right right, and the other to the left.


Place the center front with the cut line 1" from the first row of stitches, or 1 3/8" from the first fold. Once sewn, that will leave you with 3/8" to the center front seam line. Don't forget to add the interfacing after your fabric is cut, just as the pattern instructions direct.

 To add the trim, make yourself a pattern piece following the Craftsy class, or for those of you not in the class, here is what the pattern piece will look like with the measurements. Cut one, then cut in half, will be enough for both sides of the bodice.


Cut your trim, folded in half, and make sure that your end is square.
 Sew the end and trim. Fold right side out. the pin designates the pattern marking on the front.

 Matching the finished edge to that pin, pin, then baste into place.
Pin your center fronts together at the tuck seams so you know they will be the same distance from each other when sewn.

Also, before you sew, make sure that your trims match up perfectly at the beginning point. The X is where you'll put your needle down through all the layers.
Make your pocket in the same way, sewing the tucks first, then cutting the pattern. This one will be trickier than the bodice, because you'll be stitching those tucks on the bias. Be as careful as you can be!

Folding under your outside pocket seam will take some patience also. Use your bishops ruler to fold under and press, measuring from the pleat stitching, not necessarily from the pattern edge. No one will notice if your pockets are not exactly the same, but if your edge gets wide and narrow from your tuck, that will definitely be noticed!


Even if you aren't in the Miss Sassy class, I encourage you to read the part I tutorial anyway. I give you more tips for sewing perfectly aligned tucks!
http://christinehaynes.blogspot.com/2014/05/sewing-indie-with-craftsy-flirty-meets.html

Wednesday, May 21, 2014

Sewing Indie: Sew Caroline tutorial for a Peter Pan Collar Necklace

I almost forgot to deliver this post to you! Today was my assigned day to share a post by Caroline Hulse, a very popular and incredibly cheerful blogger at Sew Caroline. She is a fabric designer and has recently begun designing PDF patterns too. I hope you enjoy her post: 

Hi Sew Chic readers! My name is Caroline and I write at the blog SewCaroline.com. I am super excited to share a project with you all today. I love the vintage vibe of Laura's patterns and thought this Peter Pan Collar DIY would be the perfect addition to many of her beautiful patterns.

IMG_4095-400x600
 Supplies you'll need for this project: -Peter Pan Collar pattern template, printed to 100% -Approximately 1/4 yard of fabric (woven works best!) -Coordinating and invisible thread -Necklace chain and findings to go along with it -Sewing machine + hand sewing supplies -Scissors OK, let's get started. Step One: First, print out the PDF file found HERE. You will need to print this at 100% and/or NO scaling. There is a 2"x2" square for your reference. Step Two: Cut your pattern pieces out using the instructions locating on the collar piece. Step Three: IMG_4074-610x406 Step Four: Take two pieces at a time, matching all the edges and sewing them together using a 1/4" seam allowance. Leave 1-2" open along the top edge for turning. Repeat this for the other set of collar pieces. Step Five: Before turning the right side out, clip around the curves of the collar pieces. IMG_4079-610x406 Step Six: Turn right sides out and top stitch right along the edge that you left open. Step Seven: Using the chain-links of the necklace chain as a guide, sew the necklace using invisible thread and a hand sewing needle on to the collar pieces. You'll start in the middle and work your way to the top. When that side is completely hand sewn to the necklace chain, repeat this process for the other half of the collar, being sure to match the points in the center. Be sure both collar pieces are securely sewn onto the necklace chain. IMG_4087-610x406IMG_4089-610x406 Step Eight: Add the findings to the top of the necklace chain and you are all set to wear your gorgeous new collar necklace! IMG_4093-610x406 Thanks for reading! I hope can connect elsewhere on the Internet! You can find me on my blog, Instagram, and Facebook. xoxoxo

Saturday, May 10, 2014

Wedding Gown Redesign

I spent the day doing some minor redesigning of this dress for a bride getting married next week.


She wanted some sleeves added for modesty, a rip repaired in the back, and a bow added to the back. The problem with adding to a wedding gown is always the fabric. Matching the fabric and color is almost impossible. This bride is on a seriously small budget, so in my closet I had an old wedding gown from the '80's I was happy to cut into. This isn't a  tutorial, but I'll show you what I did.
This alteration took 4 panels of the dress. I kept the shape just as it came off the dress. The top part of the panel will become the "loops" and the bottom half will become the tie ends. I cut and sewed four triangular tops together with heavy interfacing and the bottom of two panels are sewn right sides together up the side. The bottom, which was the original hem, will remain open.

 Using my strapless sleeve pattern, I made sleeves. I always leave long ends about 2" longer than I think I need. I sew a basting stitch according the markings I did at the fitting and match this basting line to the top of the dress where I'll be sewing.
Here is what it looks like all pinned in place. I will sew the sleeves to the bodice by machine under the trim. No one will see it!
For some dumb reason, I couldn't get these to load right side up, but I gathered up all the ends for the bow parts and laid the "loops" on top of each other and baste all four layers together. I did the same with the ends. Then I laid all eight layers on top of each other.
I tacked them at the ends. It was thick, just like I wanted it to be. I made an interfaced band about 1" wide to go around the bow and cover up the raw edges and hand stitched on the wrong side.
Then I had to repair this tear, also by hand. There was no way to make this repair invisible, so part of the purpose of the bow was to make it less noticable.
I added the bow, hand stitching in place on the left side and snaps for the right. I think it turned out alright. What do you think?