Showing posts with label Craftsy. Show all posts

Wednesday, September 2, 2020

The Future of Craftsy and the Flirty Day Dress Class


 You may have heard that Craftsy/bluprint has been purchased by an entity called TN Marketing, and that they have resolved to bring back the "old" Craftsy that we once knew and loved. They aren't really set up like the youthful Craftsy I enjoyed comrade with (teachers are still wondering about contract royalties) but for sure, as of now, the promise to keep your account and "forever" class purchases still stand. Hurray!

<iframe width="560" height="315" src="https://www.youtube.com/embed/RlAHfDUKShI" frameborder="0" allow="accelerometer; autoplay; encrypted-media; gyroscope; picture-in-picture" allowfullscreen></iframe>

This image below is the landing page for my class, and correct me if I'm wrong, but it seems to me that this leading "important" statement could be used in a Marketing 101 class as an example of what not to do. It doesn't encourage me to sign up, but rather does the opposite. Is it an attempt at transparency? Let me just be clear here and say that the statement isn't correct. Yes, Simplicity is still selling the pattern, and as soon as they stop, I will publish it again afresh! The design is only licensed to Simplicity. Thankfully I am still the copyright owner and all rights revert back to me.


Now that I've worked with two "for profit" enterprises in my field, Craftsy and Simplicity, I am much wiser about these "collaborations". We independents do it for the chance at exposure, and I did gain some valuable working experience, but there is yet a list to be made of the good and the bad. In the end, would I say it was entirely worth the benefit? Once you enter into a deal with a corporation,  it's like giving a gift to a stranger. You work so hard and give it all you can, but in the end you never know what they are going to do with the gift, so be prepared to just let it all go. Don't expect to be kept in the loop. It's not in the contract. You are the last person to discover it, yet it's your face or name on the front and held responsible by the public none the less.
So now you know. The future of this pattern remains in my keeping, and here's my promise:  I promise the Tia dress pattern will be "forever" available after it finally drops off the wheel with Simplicity. Will we be safe in the hands of TN Marketing? That I can't say, but there must always be hope for a bright future! 
 
Here's the links for the things I've been talking about in this post: 
 
Have a Great Sewing Day!  
Laura

Thursday, November 20, 2014

Sewing Indie with Craftsy: Flirty Meets Sassy, part I

This tutorial was first written for Indie Pattern Month, as I was assigned to write a blog for Christine Haynes. Since we are both Craftsy teachers, it seemed appropriate to apply a related topic.


...I thought it appropriate that my tutorial for Sewing Indie should focus on our Craftsy Class projects. Pairing Flirty with Sassy makes for one adorable outfit, perfect for spring! So here we go with Sewing Indie with Craftsy: Flirty Meets Sassy Part I

Via this tutorial, Miss Sassy has become a jacket, perfect for warding off cooler weather, or a room with too much air conditioning!

This jacket adds some great color to match the dress trim in a fabulous vintage silhouette.
Miss Flirty, also known as Tia #1312, got a make over too! Adapting the trim to mirror the collar and incorporating rows of tucks down the front with a couple of cute covered buttons is perfect!
I've even included some cross tucking on the pocket just for fun.  To get all the details on how to take on the Tia dress adaptations, head over to my blog at It's Sew Chic, but stay right here for the Librarian Blouse make over.

Turning your Blouse into a light weight jacket is really easy, and only requires a few pattern changes. I always start with the top at the front and make my way down the pattern. Always mark on your pattern the changes you made from the original to guide you if ever come back to this pattern and wonder what you did!

Transferring the new neck line to pattern front

Because I knew the neck would be too high for my liking, using the pattern front without the tucks, I lowered the neck at center front by 1/2"redrawing a new line from the shoulder. (I used that pattern to keep all those tucks from getting in my way.) With the tucks closed, I transferred that new line to the view with the tucks.

Cutting this one into a short jacket
Using my bust point as a guide for length, I decide to cut off  7 7/8" from the bottom of the pattern. I am using my grid to draw a cut line perpendicular to the grain line. Draw a line 1" above for your hem mark.

Matching the side seams, front to back
  Mark your back pattern in the same manner, and then close the side dart and check to make sure that your side seams will match up.

Cut the pattern
  Now it's safe to cut away the extra.

Add additional to the collar

 Because I lowered the neckline, I know I'll have to add some additional to the collar pattern. To know how much, I have to walk the collar to the back and front pattern pieces. I had to add 3/8", and if you lower your neck the same amount that measurement will be the same for you also. Size will not matter.

Add length to the sleeve
Next, I added 8 3/8" to the bottom of the sleeve, which also includes 1" for the hem. You may need more or less length depending on your arm.

Copy these changes to the facing
Be sure to make the same changes to your facing piece. Lay your pattern right on top matching the edges and trace those off.

The facing now matches
Trimming away some of that neck front left that edge a little bit sparse, so I reshaped that curve on my facing. If you wanted to line your jacket, you can cut a lining from the front without the tucks, but you'll still need to use this piece to cut an interfacing. 

Now that your pattern is ready to cut out, let me share with you a few tips to get those tucks perfectly aligned and sewn without measuring.

Clip into the fabric
 Following the pattern markings, clip into the fabric at the top and bottom of each column. You can clip both, but the fold line is the one you need to keep track of.  

Press the fabric
 Holding your fabric at these ends, fold the fabric in half along these clips. The grain will help you line these up perfectly. Press each fold line before ever sewing a stitch.

Set your guide
Put your pattern under the sewing machine and put the needle down into the stitching line. Using a guide, set the distance to match the fold perfectly. Tape is a poor man's substitute, but these guides work better than the bumper rails at the bowling alley!

Thanks for joining me in this Flirty Meets Sassy tutorial! If you have questions you can find me on Facebook,and Twitter: @sewchicpatterns. Now head on over to part II http://sewchicpatterns.blogspot.com/2014/05/sewing-indie-with-craftsy-flirty-meets_25.html


Sunday, May 25, 2014

Sewing Indie with Craftsy: Flirty Meets Sassy, Part II

For Sewing Indie Month my assignment was to pair up with Christine Haynes (patterns) who is also a Craftsy class teacher...

 Craftsy.coom

Craftsy.com 

So I decided that my tutorial would combine our projects into ONE adorable outfit that YOU can make for yourself!
Sew Chic Patterns Tia 1312

With a few quick pattern changes, I've turned Miss Sassy into a short jacket.

Sew Chic Patterns Tia 1312
And Miss Flirty got a make over too.

Sew Chic Patterns Tia 1312

I raised the neckline, changed the trim to mirror the collar on the jacket, added tucks down the front, highlighted by covered buttons.


Sew Chic Patterns Tia 1312

 I even added cross tucks to the pocket to continue the theme.

Sew Chic Patterns Tia 1312
You can find the jacket tutorial here:
Sewing Indie with Craftsy: Flirty Meets Sassy, Part I 
But stay right here for the Tia Dress tutorial, so here we go!

First we are going to raise the neckline. Whenever you want to make an alteration from the original pattern, I recommend that you first trace off the pattern piece in your size. If you make a mess of it, no problem. You can always come back to the original and try it again!

Here are my pieces traced off. Next, mark the seam allowances around the neckline. And pin them together as if sewn, leaving the bottom of the princess seam spread out.


Use a grid ruler to draw in a new cut line. I'm going to raise my neckline 5/8" and flattened that top curve just a little, raising the center to about 3/4".  For more modesty, you can raise the neck more, and flatten the curve or go straight across for a square neckline.


What was the cut line, now becomes the sewing or seam line (easy for me!). I've extended the pattern cut lines for all pieces and shortened the shoulder piece to match with my new seam line.
This is what my new pattern pieces look like. Be sure to make a notation on your pattern so that you will remember what you did when you find this pattern again years from now! Next, I want to add pleats down the front at the same interval and depth as my jacket pattern.

Rather than cut my pattern up to add the tucks permanently, I'm going to make the tucks first, then cut the pattern. This is a great way to add may kinds of details and get them positioned exactly. Using a small square of fabric large enough for my pattern and the wide enough for the tucks, I've marked the edges of my fabric with chalk so you can see it, but normally I would just make a clip with my scissors. These marks are 1 3/8" apart from each other. I've left about 1 1/2 to the selvage. Be sure that your tuck marks follow the grain!

Fold the pleats along the marks and press. Your grain will keep these perfectly straight. Now sew your tucks at 3/8" from the fold line.

To keep these tucks straight, use a guide, not your eye, or a piece of tape. Cutting 2, one set of tucks will be pressed to the right right, and the other to the left.


Place the center front with the cut line 1" from the first row of stitches, or 1 3/8" from the first fold. Once sewn, that will leave you with 3/8" to the center front seam line. Don't forget to add the interfacing after your fabric is cut, just as the pattern instructions direct.

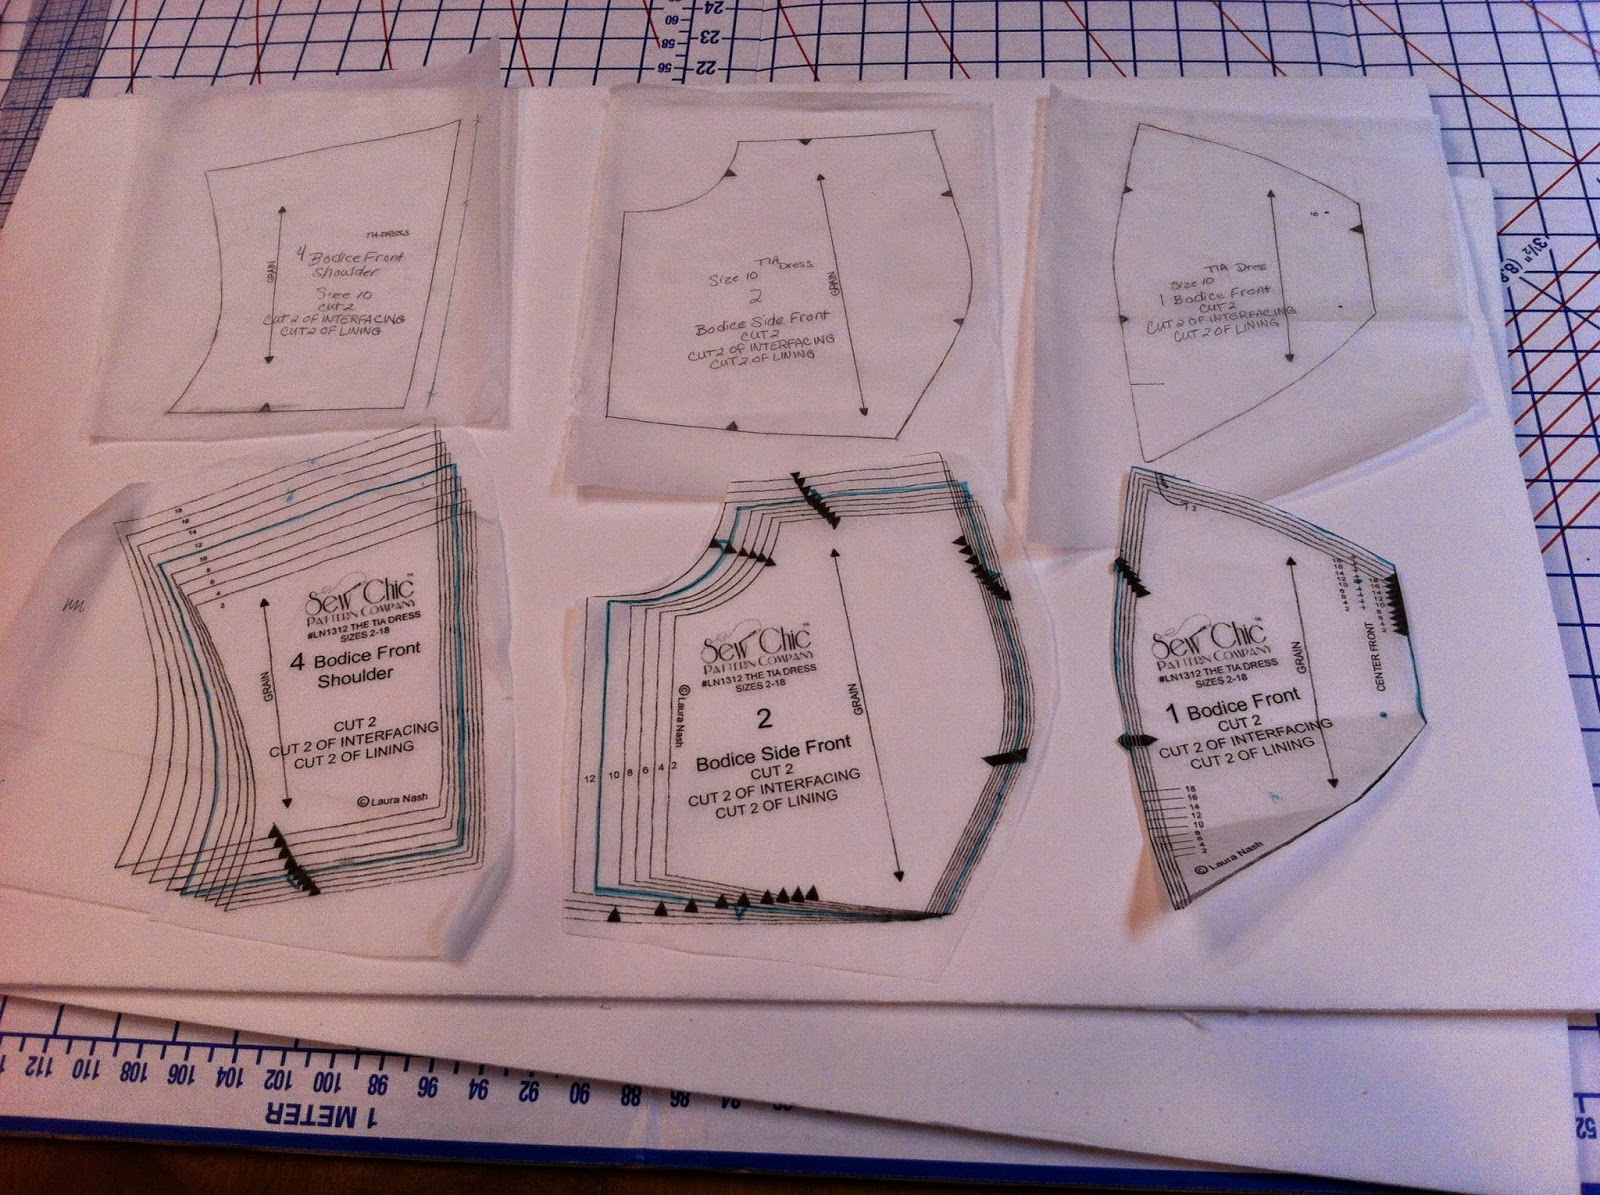
 To add the trim, make yourself a pattern piece following the Craftsy class, or for those of you not in the class, here is what the pattern piece will look like with the measurements. Cut one, then cut in half, will be enough for both sides of the bodice.


Cut your trim, folded in half, and make sure that your end is square.
 Sew the end and trim. Fold right side out. the pin designates the pattern marking on the front.

 Matching the finished edge to that pin, pin, then baste into place.
Pin your center fronts together at the tuck seams so you know they will be the same distance from each other when sewn.

Also, before you sew, make sure that your trims match up perfectly at the beginning point. The X is where you'll put your needle down through all the layers.
Make your pocket in the same way, sewing the tucks first, then cutting the pattern. This one will be trickier than the bodice, because you'll be stitching those tucks on the bias. Be as careful as you can be!

Folding under your outside pocket seam will take some patience also. Use your bishops ruler to fold under and press, measuring from the pleat stitching, not necessarily from the pattern edge. No one will notice if your pockets are not exactly the same, but if your edge gets wide and narrow from your tuck, that will definitely be noticed!


Even if you aren't in the Miss Sassy class, I encourage you to read the part I tutorial anyway. I give you more tips for sewing perfectly aligned tucks!
http://christinehaynes.blogspot.com/2014/05/sewing-indie-with-craftsy-flirty-meets.html

Tuesday, September 3, 2013

Behind the Scenes at Craftsy


The project I'm teaching at Craftsy is this Tia Dress
 "So how was your trip to Denver?" my son asked me. Having filmed and edited movies before, he wanted to know the "behind the scenes" in making a Craftsy class. "You mean there is no script?"  The outline that my producer and I had sketched out weeks before was as much a script as there was.  This outline helps the producer evaluate the content to keep each lesson within the maximum time allotment and ensures that the critical elements are included.

Once on the set, the things I had yet to perfect were more movie-like than academia, things like remembering the format for introducing each lesson. It turned out to be a tongue twister to say "Sewing Vintage" instead of "Vintage Sewing." A sign taped it to the camera  helped me out immensely.  

With two cameras trained on me at all times, it's appropriate to:
  • speak to the camera whenever possible
  • when sewing, keep my left hand flat
  • don't talk to just to fill space
  • if I need to stop, turn statuesque (and don't move anything!)
  • move slowly so the camera has time to follow
  • keep all tools/step outs close at hand

We would start the day as soon as make up and wardrobe was complete. The goal was to complete 3-4 lessons in a day, and though video can be picture perfect (retaping again and again), it's a tight schedule to keep, and frankly, it's unnatural to be too scripted. It's the Craftsy way to share the teachers eloquence and skill as it happens, just as it would be in a classroom experience. However, the last day was a rough start for me, continually stumbling over my words. I was able to begin again and soon I had my rhythm going.

Nine different lessons means nine different outfits. I had to stay away from  solid white, black, stripes or small prints, and that ruled out much of my wardrobe. Wearing a microphone also meant that my clothing had to be capable of both hiding the wire and clipping to something- a pant, skirt, or some kind of belt. I packed my suitcase with anything and everything that had possibility. One thing that didn't work in my favor was dress linings and taffetas. I had put on the Beatrice dress in plaid and was ready to start the lesson when the camera man stopped me. "I hear something" he says. He fiddles with my microphone and goes back to his post. I begin talking, and again he stops me. Puzzled, he says "What do you have on under there?" The stiff lining made crackling noises!


I hope you'll take my class, set to debut in October. I am teaching some very unique vintage sewing techniques using the Tia Dress, # LN 1312, and you get the pattern sent to you free with the class purchase. Next week I'll show you some of the special features that we'll be doing in the class. And as we say at Craftsy....

I'm Laura Nash, and THIS is Sewing Vintage!

Tuesday, August 13, 2013

The Craftsy Experience

I've been in Denver this week taping a class for Craftsy (see Craftsy.com). If you haven't heard of this site, it's a company that pairs with the most knowledgeable instructors to create and market classes of all sorts for almost any type of creative talent such as sewing, knitting, cooking, crochet, drawing, cake decorating, gardening, the list is really long. In fact, they call their teachers "talent". I like that name. This idea of online classes really challenges the traditional way of learning, which has been through community classes and colleges, and even universities- if a person is interested in or needing a skill but not the degree. It's an asset to anyone who wants to learn (and has the internet) but doesn't have access to good teachers. Once you buy the class, it's yours forever. You can watch or review the class as many times as you like and ask any questions to get an answer from the teacher. The best part is it's not expensive.

I have taught sewing classes for many years, but video taping a class intended to last a lifetime seemed like a big responsibility! Our project will be the Tia Dress, with a few modifications that would add additional vintage techniques and lots of added value for the student. I added in a panel behind the side zipper (so it doesn't catch your Valentine Slip and under things as you zip up!) that I am calling a zipper facing, and added hem tape to some very important places, a zipper extension, a waist stay, and at the 2' turned up hem. I also included a lesson for a petticoat without a pattern and making a pattern piece for the bias trim. I show how do bust cup alterations and a hand sewn hem common in the 50s. All the way through I show you how I use my many vintage tools to good advantage.

Once I got to my motel, Craftsy shows me love with a small gift:

And I was met with a surprise from the baggage handlers too. My box with sewing supplies was shattered, and many things got broken.
I transferred my sewing supplies to my make-up bag and used shipping tape to span the broken side of my box to keep it inside.

 My meal was a "chili chicken" soup that was very yummy. I didn't know you could make water taste so good! (I'm not much of a cook :-\)
Every morning the make-up gal (see http://danicajardien.com/ ) came to pick us up, I and one other instructor, and we drove to the studio. The other instructor was teaching a figure drawing class. The days were long, as  I got up at 6:30am, usually ending around 7-8 pm. It didn't help that I had been burning the candle at both ends before I came. Danica did a fantastic job with my make up, but there is no magic to cover those dark and sleep deprived eyes!

This is the view from my room at 3am when I couldn't sleep.

 
I and the film crew ate lunch every day in the common room shared by all the businesses that rent in the building. I love it! It has a very cheerful feeling, but that piano would be an unwelcome sound should Craftsy be taping!
 
 I was able to get out of my room one night to get some fresh air and visit the mile long mall just a block away. Everyone was out trying to make some cash. There were beggars and really good musicians and horse and buggy rides too.

 
Homelessness is prevalent in Denver. There was a mission home close to where I was staying, and every night on my way back to the motel people were lined up for 3 blocks hoping to get a room for the night.  I discovered a guy who had made a home on the floor of the electrical room just a few doors down from my room. I met him coming out, and saw there was a bed on the floor. Thunder storms and rain are common at night, and he'd managed to find a warm place to sleep that was out of the way.
 After 3 solid days of sewing and filming and photos and sharing, the dress was finished. Though I worried about my performance, I'm not really sure why. The producer was kind and the whole crew was helpful and complimentary. It was truly a fascinating experience, but it was now time to pack up my bags and head for home. I'm looking forward to a long nap!
It was nice to meet the day with some sunshine too!