Sunday, September 2, 2012

Sew Chic Pattern Review in Threads Magazine

This week at the end of a phone order for the Phantom pattern, the caller says "You know Threads Magazine had a review of your pattern in this months issue." My voice brightens "You don't think I would MISS that do you?"  I knew the review was coming, but I didn't know what the review would say, or if it would be......left unprinted. The truth is I could very easy miss a review of another sort, if someone didn't mention it, so thank you to that customer who took the time to call in her order so she could tell me. How could she have known that inside my  mailbox last weekend was a huge manila envelope with this really spiffy folder:


Inside the folder was a letter congratulating me on the upcoming review, and along with two other sewing magazines published by Taunton, was the current Threads Magazine with a marker for a quick turn to the review: 


What? You say you'd like a closer look? Well, okay if you insist...


Not all reviews gets a photo of the outfit, so that was special too. I love to see the pattern come to life, and this ensemble is definitely modern chic. I love the wool they used for the pants. The review gives it a "challenging techniques" icon, probably because the jacket/shirt assembly is compatible with sheer fabrics. All but the center back, side, and armscye seams are enclosed. I used a serge on mine, but a french seam  would be top notch quality.
In this magazine was another bonus: Threads did an article on independent pattern companies. The caller hadn't read the article yet, but had noticed the Spin Skirt in the cover photo. It was truly an honor to be numbered among so many talented and skillful pattern makers.
 
 What did my family think? My son noticed his sister's face, barely visible in the corner, and exclaimed "Elise is famous!"

Ahhhh, trumped again. 

Please, if you write or see a review of one of  my patterns, do tell me about it. I wouldn't want to miss that!

Friday, August 24, 2012

Sewing Apron Giveaway!


Back in the day when I used to design costumes for theater, I worked with Claudia Echols of Not the Norm. She sewed some of the more difficult designs for me, so I came to trust her work and knew that the project would come back perfect - and in theater, that's a rarity! Recently I called her up to find out what she was up to these days. Turns out she is now selling kits and manufacturing sewing aprons, and she brought me one!


This apron sells for $65 on her website: http://www.notthenorm.biz/#!store
and looks to be very practical and sturdy. The top pocket flap has built in space for straight pins and sewing needles:


Open the magnetized flap to reveal more pockets and slots for your sewing tools:

All the bigger things like scissors will easily fit in the lower pockets.

Wouldn't you like to have one of these to carry around all of your sewing tools! September is national Sewing Month, so it seems a good time to give this apron away to one lucky winner on Labor Day, Sept. 3rd. If this fabulous apron is something you will make good use of, all you need do is make a convincing comment below. PLEASE make sure I can contact you by email, and that it's an email you actually use. Sorry, but because of the high cost of shipping, this giveaway is open to US residents only.

UPDATE: Sept 5, 2012: Thank you to everyone that entered this giveaway. Congratulations to our winner, Kristie!


Monday, August 6, 2012

Make your own Ironing board pad

As a little girl I remember my mother sometimes ironing on a  doubled up towel over a table. The fact that steam and heat can really damage wood probably never crossed her mind since ironing boards were once made of wood. As a little girl, she would have ironed on a board like this, using a snazzy "Steam-O-Matic" iron like this one. Seems like everything was an O-Matic back then.
 
 Anyway, the point of my mother's method is that it's really hard to iron on a completely flat surface, so the board, whatever it is, must be padded. Too much or too little, and it's hard to get a smooth finish, and what is just right is likely a matter of opinion. Here I will show you how to piece and pad your ironing board and then you can take it from there.

 My ironing board has 3 layers of the standard "market" purchased padding, but let me say that this is likely the most expensive kind. You can cut your own using 100% cotton batting, the kind we put in quilts. Several thin layers will usually be better than one thick layer because the thicker batting has too much loft, or air. This will lead you down the road of  too much softness.

You might wonder, why cotton? Because it can easily handle any amount of heat and moisture from your iron without damage. Polyester batting will melt in high heat situations, it won't absorb moisture, and besides, they usually have too much loft. Commercial pads can be made of polyester, but they will have the addition of a heat retardant, like fabrics made for kids sleepwear. They still don't absorb moisture well.

 Let's take a look at these commercial pads to see what kinds of features you might like to add to your padding collection. Working from the board up, the first pad on mine is extremely thin. I would guess this is the pad that is original to the ironing board. What you are looking at is the muslin cover, made just like the top cover with a draw string. This layer is meant to be added protection from burns and water spills, but is totally optional. Should you like this idea, this muslin should be the last layer, going over all layers of padding, not the second layer as I have it! In my case, this muslin would be too small to cover all these layers so it will stay as it is.

Next you see two more layers of commercial pad. Another extra detail they both have is a cotton end pocket for you to slip your ironing board into. This feature is also totally optional, but helps them to sell the product for a higher price.
 Here is a close up of that pocket.
Another feature of this middle pad is a serged edge. Also completely optional. Makes the edge look nice I guess- but who is going to see it? You'll want to be careful that you don't stretch the batting while you serge or you'll end up with ripples.
 This top pad is a mix of cotton and polyester that has been pieced. This pad was probably the most expensive of the three for that reason. Because polyester can be made retardant, but never will absorb moisture, the manufacture decided to add a little of that spendy cotton batting just in the middle where the board gets most use. Cotton batting is expensive- so if you have a polyester pad that is damaged just in the middle, it would be very frugal to piece in the cotton just where needed. Or if you want to replace the whole thing, use cotton batting left over from a quilt project and splice those pieces together.

Here on the back side you can see they used a tricot (also a very meltable fiber!) tape to stabilize that pieced seam. I recommend a cotton bias tape pressed flat instead. Use a three step mending stitch, or even a zig-zag stitch across the seam, butting the ends, and centering the bias tape. It can also be done in two steps if you feel more confident with that. Sew the batting first then sew over it again with the bias.

Now that you have your pad fixed up and ready to lay out, how big should it be? Because the edges get a good amount of wear, cut it long enough that it will easily cover the sides of your board. Just trim it right on the board to fit. Together, my last two pads cover well enough. We like to use the end a lot, so my end is much longer than it needs to be. It goes well under, and as you can see I do not need and cannot use those end pockets. Yours does not need to be this long.
It does not need to be cut exact either. Just remember that your cover has to be big enough to handle all the padding that you give it!

Here is the link for how to finish the job right with a cover that is custom sized to your board:
http://www.sewchicpatterns.blogspot.com/2012/07/how-to-make-ironing-board-cover.html

Happy Ironing!

Saturday, August 4, 2012

Illustrator Annie Jones sews with free patterns

Hey, Sew Chic followers!
My name is Annie and I get to do the illustrations on the front of Laura’s pattern covers. 
I had never even thought of doing fashion illustration until Laura asked me to do it for her, but now I LOVE it! I love how classy and vintage Laura's patterns are, it’s so fun to get to draw them! 

Laura asked me do a guest post for her blog and I was so excited when she asked, and then I panicked because I had no idea what to talk about. 
So I figured that sewing might be a safe topic because most likely all of the followers of this blog enjoy sewing. (Annie gives links to the printable patterns for all her projects)

To be perfectly honest, I'm not a very advanced sewer.
I bought my first sewing machine less than a year ago. 
It’s a simple Brother machine that I found on Overstock.com for $64. 
It has this really awesome zebra pattern on the front. 
But I really enjoy sewing!
I bought my sewing machine while I was pregnant so that I could make things for my soon-to-come baby. 
 I thought I would post some of my favorite little sewing projects on this post.
Most of the projects are for a baby.
All of these projects come from free patterns or tutorials that I found online, so I'll link each project to it's tutorial.
These projects are easy, fun, and cute.

K, first off, these baby shoes.
A beautiful friend of mine pretty much made these for me, with my occasional assistance. 
She made them in just a few hours.
I cannot get enough of baby shoes and I think these are to-die-for adorable. 
They stay on my baby's little feet really well because of the elastic. 
The pattern is free online. Thank you, Pinterest, for this find!
One of the things that I use ALL THE TIME is this changing pad. 
I keep it in the diaper bag and I use it when there isn’t a changing station to use and even when there is a changing station because, I don’t know, I don’t like laying my baby on that dirty plastic that plenty of other babies have put their poopy bums on. 
(Um, yes, I did use the same fabric for the shoes and for the ties on the changing pad and I may have also used it on her car seat cover as well. I kind of really like it.)
For some bizzarre reason I thought that my baby would be in newborn sizes for less than a week (maybe because my husband’s siblings were all huge babies, one was almost 11 pounds) so I didn’t buy any newborn clothes for her. 
Seriously, none. 
Turns out, she was in newborn clothes for more than a month. 
Luckily I had a pattern for this newborn dress
and it was one of the only things that fit her in that first month.
Adorable and easy. 
I completely messed it up and it still turned out cute.

I think decorating onsies is fun! 
I especially loved how this onesie turned out with the little flowers
 on the front. 
So easy to make and the onesie goes with so many things.
My mom made my baby several fat quarter skirts
and the cool thing about these is that, with the elastic, that chicken skirt that she’s wearing at 9 months also fit her when she was a newborn.
A cute, easy-to-make nursing cover .

And here are a couple non-baby projects:

Here are two different tutorials for a bow tie, both of them can also be used to make a hair bow. 
took 20 minutes at most to make.
takes a bit longer to make, but I think it looks more professional than the one on the left, which I liked for a bow tie.
You can also make mini versions of both of these to make a bow tie for your baby boy, or mini hair bows for your baby girl.
And last but not least, I needed something to jazz up this cute and simple dress and this fabric belt
was perfect! 
Most of the links lead to websites and blogs that have lots of other sewing patterns and tutorials, so if you are looking for more ideas, those links are worth looking at.

Thanks for having me on the blog!
Friday, July 27, 2012

How to make an ironing board cover


For a while I've been living with this REALLY nasty ironing board cover. It was so bad that I would not expose you to a photo...too embarrassing. Like mending, these tedious things sort of pile up on me because I don't really like doing them. Today I finally made a new cover, and it wasn't so bad. In fact, it was pretty easy, painless, and REALLY cost effective. My pad is still in perfect shape, but if yours is worn out, replace it with 100% cotton batting, at least 2 layers. It can be pieced also. Use cotton thread and a mending stitch. Here is a link to how to do it: http://www.sewchicpatterns.blogspot.com/2012/08/all-about-ironing-board-padding.html

I found a scrap of cotton fabric that had the look that said "I belong on an ironing board!" It wasn't quite long enough, so I pieced it at the end, turning the grain.You can see the seam at the right hand arrow.

Lay the rectangular fabric on the board. Trim the fabric leaving about 3" of  hang all the way around. It doesn't have to be perfect, so don't stress over this. I wasn't very careful, and you can see by the left side arrow that I left too much hang on that side. This will be a slight difficulty for me when it comes time to tighten the cover, but nothing impossible to deal with.

Next, sew a casing all the way around. I always do this by pressing under 5/8" from the raw edge and then press under again 1/4" inside the seam allowance. Top stitch close to the inside fold all the way around. You'll have to overlap fabric in tiny tucks around the curves. If you want it to look beautiful, do a basting stitch at the 1/4" fold and pull the thread to gather the fabric in before you stitch it down. For me, I don't care. This job doesn't have to look too pretty, it just needs to get done. Leave a 1/2" opening in the stitching somewhere.
My drawstring is going to be some nylon string that I have in my junk drawer. I need to thread this string through the casing all the way around the cover. A bodkin is a fancy tool invented to do this job, but as you can see, I've never used mine. I prefer a safety pin. I put a knot in the end of the string and then put the pin through the knot. I push the safety pin which leads the string, pulling it through the casing.


Lay the cover back on the board and pull the string until the cover is tight. Tie a knot or a double bow.


My cover is clean, white, lovely, and finished.Yay! I accomplished it. I should go do some ironing now...
Saturday, July 21, 2012

Spoonflower: Make and Print your own Fabric!

Fabric and clothing design are like laces and shoes. Burgers and buns. Fountains and water. Together they help fulfill and compliment each other. Very often, but not always, my new designs start with fabrics that I find inspirational. When the design idea  comes first, I have to search around for a fabric to fit with my still imaginary style, and you can guess this is sometimes a frustrating effort. How often have you looked for even a plain fabric in the right color to use as a binding, trim or contrast and come up empty handed? There is a solution you may not have thought of: Print your own!

Last year I started designing and printing my own fabrics. Using a product called Bubblejet 2000 that prepares cotton or silk fabrics, I can permanently print any image onto fabric with an ordinary inkjet printer. Quilters have been using this product (or fabric prepared with this product) for years to make what they call "memory" quilts. But instead of printing a digital photograph onto fabric, I created my own high resolution repeatable print images from scratch on the computer. The uses, applications, and colors are limitless; the only limitation is the size of your printer. If you can print letter size only, check to see if you can set your  printer to "banner". In banner print, you are still limited by width, but not by length. If your project requires a wider width without seams, you can upload your image to Spoonflower.com and they will print your fabric for you. You can see the fabrics I uploaded to Spoonflower here: http://www.spoonflower.com/fabric/681353   

Spoonflower is a great place to buy fabrics designed by others too. I LOVE this fabric by Bob Staake.


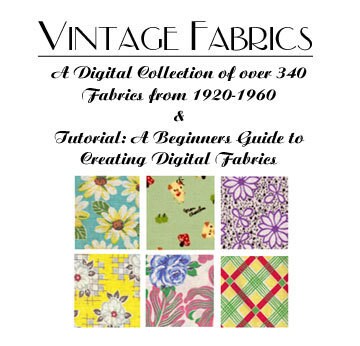
Designing your own digital print is only a little bit complicated, depending on your design idea. It also helps to be familiar with the program you'll be using to design with.  If you are a graphic designer, then you're well on your way to becoming a famous fabric designer! If you are new at this, start with an idea that will be easy to repeat and execute. For the next month, I've listed my vintage fabrics tutorial CD, available on Etsy, for half price. Using a step by step format, I go through the process of designing a print for fabric printing using photoshop. If you know your way around it, just about any drawing/image editing program will also work. If you know of a good tutorial on the web- let us all know about it with a comment and I will add the link to the bottom of this post.

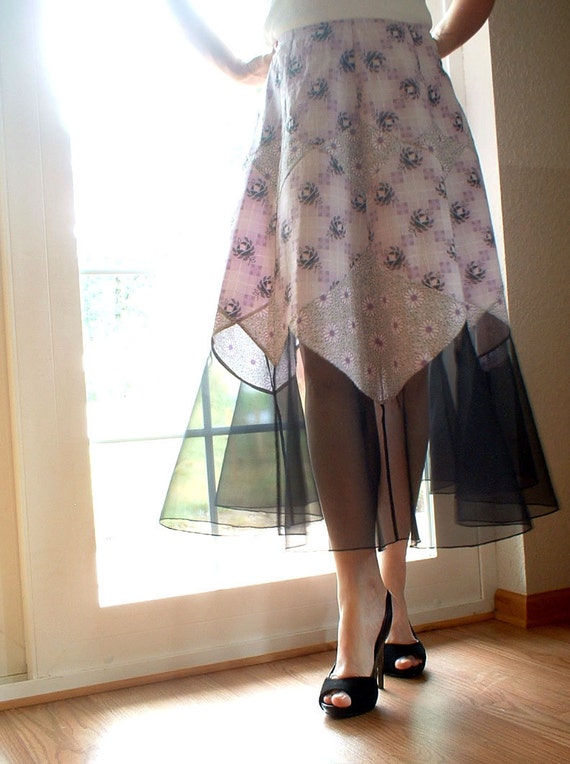
Using the Starter Skirt Pattern #1000, view A, here is me wearing the skirt I made from the fabrics that I printed. What do you think?


Saturday, July 14, 2012

Fittings with Julie

I have so many irons in the fire right now my head is spinning. We are working on a coat- a suit- and 3 dresses, all at various stages of the game. Yesterday was to be fit model day and I had concocted a plan to post photos of little snippets of the fittings for you, but alas, she had to cancel at the last minute. :-(

To stay within the same theme, I'm going to show you some photos of fittings I did with Julie, a former student. Julie does not have too many fitting worries, though she is larger busted, and has narrow shoulders. This is a common situation.


I suggested [when sewing with my patterns] that she use a smaller bodice size to get a narrow shoulder, and then do a full bust adjustment. She then made the Fantasia Pattern and came to visit me for a follow up fitting. I should have taken a photo full front but didn't think about that until too late. The fit isn't bad, but the shoulders are still too wide for her, and the bodice length is too long.


The wide shoulders are pretty clear in this back shoulder photo. She could go down one more size, and then the shoulder and length would fit better. She would have to add a bit more width into the full bust adjustment, which would give her the width that she needs for the bust measurement, and then transition to the larger size for the waist. Since she already made this alteration, there is another easier way to accomplish the goal, which I will get to at the end. For now, here's how the fitting went:


 When making alterations, I always start at the bust and work my way down, then up. Get the armhole right, then you can deal with the sleeve and shoulders. Though the sleeve is attached, in the order of operations I pinned the sleeve on last.


The armhole was a bit sloppy, so I took in about 1/4" to make everything a bit more snug. Here's a good close up.


 Then I pinned the skirt up to the waist where it belongs.
Last I pinned the sleeve on all the way around the arm where it looks the best. See that little ripple(s) in the back? I would have liked to take that back in just a little more narrow, but she likes the room back there. We'll call that "wearing ease".

If everything else looks and feels good, here is the way to reduce width at the shoulder without messing with the rest of the pattern: 

Draw a line to cut through the middle of the shoulder, squaring off ending at the armhole just above the notch. Cut the pattern apart along this line.


Slide the shoulder piece along the horizontal line, overlapping the vertical line until the shoulder is the correct measurement.


 True the jog in the two pieces, and your pattern is done.

It's always a good idea to "walk" your sleeve pattern to to the arm hole to make sure that it still fits. On Julie's dress, all is fine because the reduction at the princess seam was taken up in the longer reach of the shoulder line.


Here is the sleeve again from the front. If I remember right, that fold in the sleeve is from a fold in the fabric- needs pressing.  Looks good, doesn't it?

I cannot say it often enough, that fit is a matter of personal taste. If YOU like the fit, then it's perfect!