Tabletop ironing boards are inexpensive and readily available in almost every craft or home supply store. The covers, however, can be problematic because they are hard to find or expensive to replace. When looking to find or replace a cover that will fit your board, your options may come down to buying a new board or making due with a cover that is far too big! Luckily, resizing an inexpensive standard cover (ours cost $5.95!) is a quick and and simple process, and you'll finally be able to relieve your designated ironing towel of its unconventional duty.
YOU WILL NEED:
Ruler
A purchased ironing board cover
A cover-less tabletop ironing board
Pins
A match
6 large safety pins
A shoelace (or any small sturdy cord)
Start by placing your board on top of the wrong side of your cover, keep it centered and towards the tapered part of both pieces. Remove the stitching on the casing that holds the pull cord just along the bottom end of the cover about 2" into the end your board.
Measure and mark two inches off the bottom edge of your board. Cut on the line drawn, rounding the corners in to match the shape of your board corners. Mark a seam allowance, matching the seam of the rest of your casing (~1/2").
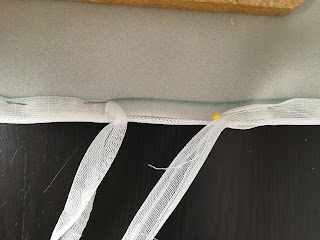
Take the casing with cord inside and pin over the edge of the fabric, making both halves of the casing visible from both sides. Pin from each undone edge of the casing and pinch the excess at the center. Pull the cord up close to your fabric, you do not want to cut this!
Cut the excess casing, leaving enough for the ends to overlap. Pin this closed.
Pull the plastic cord tight. Cut off excess and, using a lit match, melt the tips of your cord to prevent unraveling.
Sew the casing as pinned, sewing close to the casing edge over the drawn seamline, reinforcing where the stitching meets.
Pull tight and check tautness. Tie the cord and flip to the underside of the cover to get it out of the way and prevent snagging.
If your cover remains slightly too loose, use the safety pins and shoelace or cord to thread and lace reinforcements across the bottom. To do that, attach the safety pins along the underside leaving about 1/2" visible from the right side, three on each side and evenly spaced. The placement need not be precise. Cross thread the shoe lace through the pins and tie the two ends of the cord together.
And you're finished! Enjoy the use of your new and removable ironing board cover!


No comments:
Post a Comment
Thank you! Your message is important to me ♥