This is going to be one long humdinger of a post! The whole bodice all in one giant BIG GULP! Be glad I didn't get the skirt finished this week too. :-D
First let me say that I did not look at the guide sheet that comes with the pattern, so my assembly will include some time-saving all-by-machine methods employed to make the originals you see on the package front. My methods are not always "conventional", but they are fast, efficient, and produce good results. It's no secret that sewing time is precious and don't they say that whomever makes the most dresses wins??
PREPARE THE PARTS
Presumably you've already done a test
fit with your interlining, made any needed changes to the pattern and interlining. You will have removed stitching and pressed theses pieces for reuse, and cut your fashion fabric from the corrected pattern.
My
favorite all purpose method for marking is with waxed dressmaker carbon and a tracing
wheel as it is quick and accurate. On this pattern, except for this inset, do
not mark the fashion fabric. Use the markings from your interlining.
I
use clips to mark the pleats. The pleats are on grain, so with a tug at
parallel clips, that pleat should fold right across for you.
Then give
it a press before it escapes!
Interface and complete the front to prepare it for merging with the interlining.
While you've got your iron hot, press your interlining to the fashion fabric to help temporarily bind the layers with heat. Pin the edges and baste the perimeter.
Baste up the center of each dart.
After basting layers it's always a good idea to check your piece against the pattern and give it another trim.
Sew all darts at one time, including the lining. Notice the uneven length of muslin to lining. This was a correction that I forgot about at the interlining fitting stage. I will end up trimming this away once I get to the bodice assembly! At this point thought, I'm still wondering why they don't fit.
I trim away excess and press open. If working with two colors like I am, it's handy to have two machines threaded, each with the correct color scheme for the palette.
INSET ASSEMBLY
Sewing that inset curve is just like sewing a princess seam. Always sew with the curved piece on top. Be sure to trim that seam and press the seam down.
To sew the lining to the front, I sew each side separately, leaving the center seam free. I find my seams lay better.
Clip that center right up close to that stitching or it will pucker. You'll know when you turn it if you didn't clip close enough.
Turn right side out, understitch, press and baste the lining to the front. DONE!
BODICE ASSEMBLY
Once the center back and shoulders are sewn, it's time to insert the inset.
It was at this point that I realized WHY my interlining inset was 1/4" shorter than my matching pieces: I couldn't make it fit! Once I trimmed away that 1/4" to match my muslin, it fit between the symbols perfectly. BASTE the inset into place. We'll be doing a final fitting and you'll have opportunity to attach this permanently when attaching the lining.
Pin the side seams in place and give the bodice a try-on. You can see mine didn't go perfectly, but nothing I can't fix.
So undo the basting...
And re-pin to fit. Notice that I've pinned the bodice to my t-shirt underneath to keep from pulling too much. MUCH better, right?
Once removed from my body, keep those pins in place and trim off the excess beyond the seam allowance.
Use the trimmings as a guide for cutting the opposite side to match. Re stitch the inset.
Now we are ready to sew lining around the neck. As before, you'll need to stay stitch that lining under bust curve and clip to match to the inset. Don't forget to understitch and press the finished neck edge well.
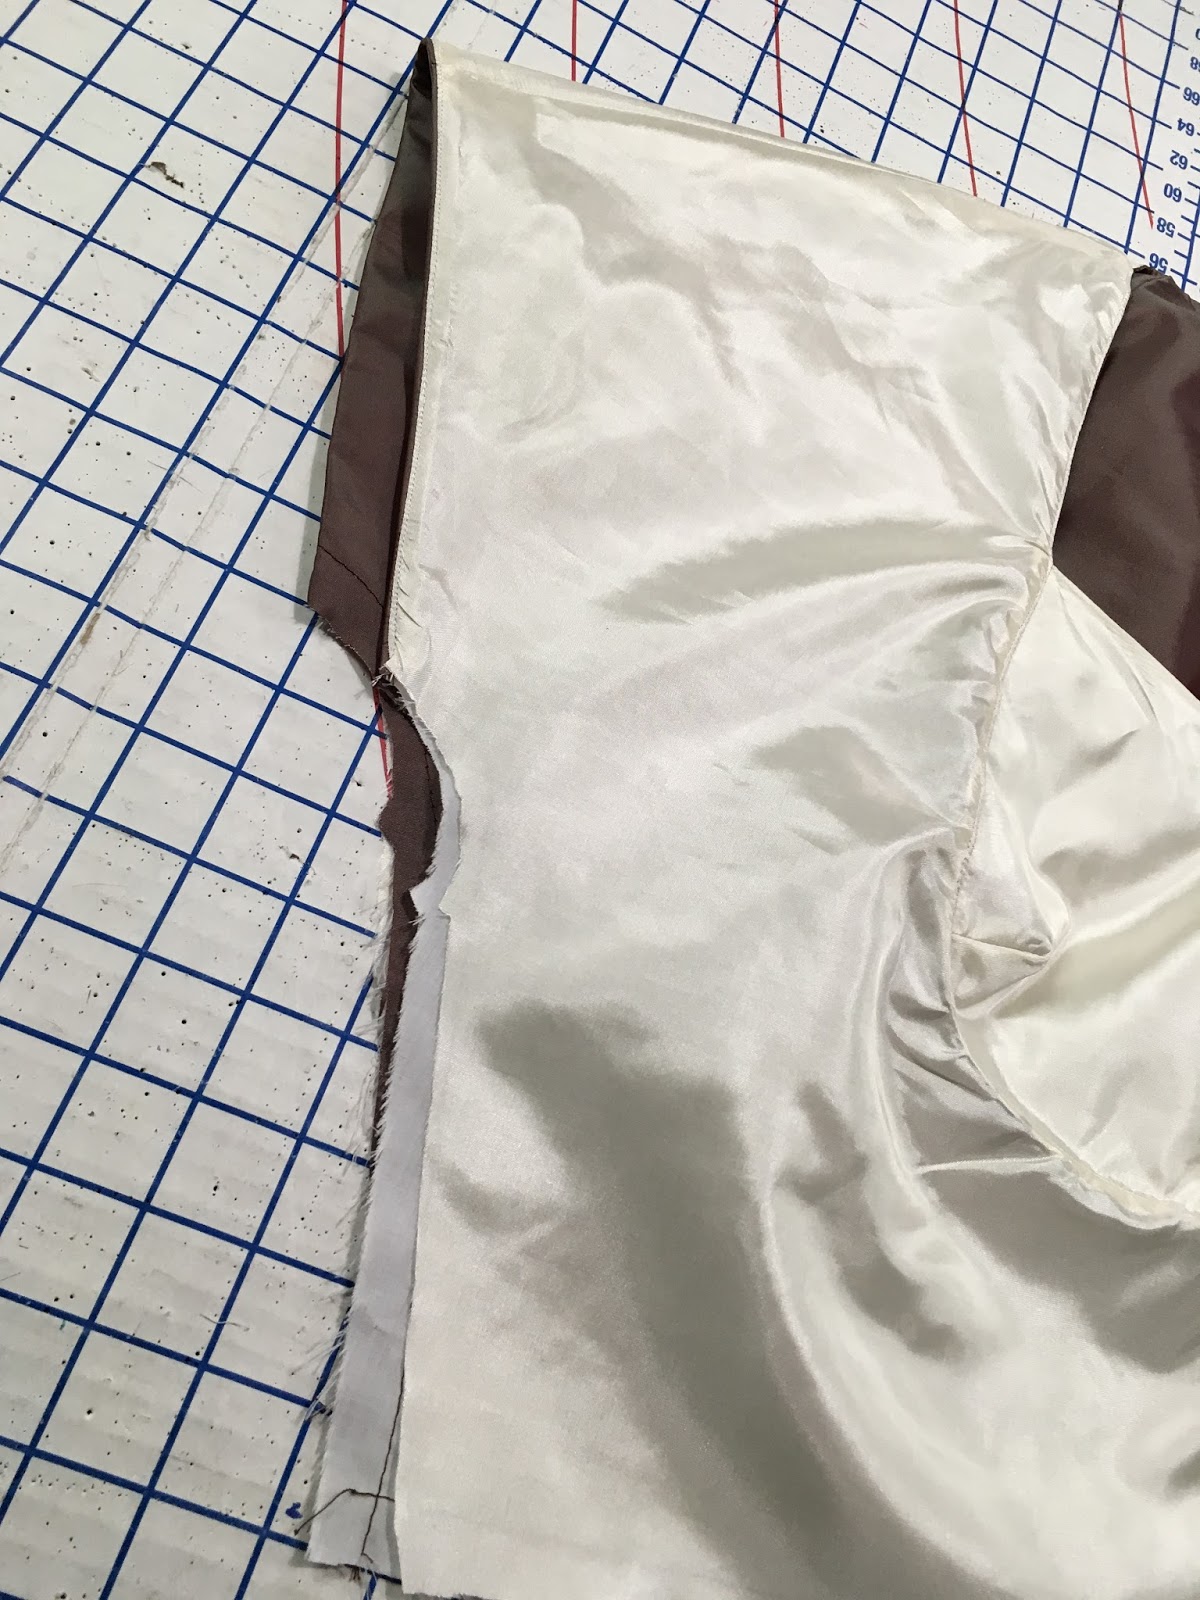
Now I move to the sleeve hem. Turn the the sleeve and lining to right sides together, encasing the bodice sort of like a taco!
Pin, sew and trim that sleeve hem.
Put your hand in there and turn it right side out. This is the fun part!!
Sew from back to front to understitch. The back has a larger opening to help you reach the front.
Just lovely! Now we move to the side seams. I usually start with the right side because the left side will have an opening for the zipper.
Matching the sleeve hem seams first, I pin in place and make my way down the lining side, matching lining to lining and then the opposite fashion to fashion side, stitch up one side and down the other.
Trim seams and clip the underarm curves, press seam open. Leave a 7" opening from the waist for the
opposite side, basically sewing just the sleeve curves. Clip into the
seam and trim the underarm, but be sure to leave all of your seam
allowance for the zipper.
The lining is rolled to the inside and pressed. Doesn't that sleeve opening look beautiful?
If you've made it this far, then congratulations! The hard part is done. Next we'll move on to the skirt and finishing!
You might be interesting in this post about altering this pattern (and FBA)
http://sewchicpatterns.blogspot.com/2018/02/sewing-with-sew-chic-altering.html
And this one about measuring and sizing for this pattern:
http://sewchicpatterns.blogspot.com/2018/01/sewing-with-sew-chic-preparing-to-sew.html
Are you making this dress? Leave me a note or a link!
Have a wonderful sewing day, and I'll see you next time!
Laura


No comments:
Post a Comment
Thank you! Your message is important to me ♥