Showing posts with label laura nash. Show all posts

Wednesday, September 2, 2020

The Future of Craftsy and the Flirty Day Dress Class


 You may have heard that Craftsy/bluprint has been purchased by an entity called TN Marketing, and that they have resolved to bring back the "old" Craftsy that we once knew and loved. They aren't really set up like the youthful Craftsy I enjoyed comrade with (teachers are still wondering about contract royalties) but for sure, as of now, the promise to keep your account and "forever" class purchases still stand. Hurray!

<iframe width="560" height="315" src="https://www.youtube.com/embed/RlAHfDUKShI" frameborder="0" allow="accelerometer; autoplay; encrypted-media; gyroscope; picture-in-picture" allowfullscreen></iframe>

This image below is the landing page for my class, and correct me if I'm wrong, but it seems to me that this leading "important" statement could be used in a Marketing 101 class as an example of what not to do. It doesn't encourage me to sign up, but rather does the opposite. Is it an attempt at transparency? Let me just be clear here and say that the statement isn't correct. Yes, Simplicity is still selling the pattern, and as soon as they stop, I will publish it again afresh! The design is only licensed to Simplicity. Thankfully I am still the copyright owner and all rights revert back to me.


Now that I've worked with two "for profit" enterprises in my field, Craftsy and Simplicity, I am much wiser about these "collaborations". We independents do it for the chance at exposure, and I did gain some valuable working experience, but there is yet a list to be made of the good and the bad. In the end, would I say it was entirely worth the benefit? Once you enter into a deal with a corporation,  it's like giving a gift to a stranger. You work so hard and give it all you can, but in the end you never know what they are going to do with the gift, so be prepared to just let it all go. Don't expect to be kept in the loop. It's not in the contract. You are the last person to discover it, yet it's your face or name on the front and held responsible by the public none the less.
So now you know. The future of this pattern remains in my keeping, and here's my promise:  I promise the Tia dress pattern will be "forever" available after it finally drops off the wheel with Simplicity. Will we be safe in the hands of TN Marketing? That I can't say, but there must always be hope for a bright future! 
 
Here's the links for the things I've been talking about in this post: 
 
Have a Great Sewing Day!  
Laura

Saturday, February 24, 2018

Sewing with Sew Chic - Simplicity 8439 Bodice - Efficient Sewing

This is going to be one long humdinger of a post! The whole bodice all in one giant BIG GULP! Be glad I didn't get the skirt finished this week too. :-D

First let me say that I did not look at the guide sheet that comes with the pattern, so my assembly will  include some time-saving all-by-machine methods employed to make the originals you see on the package front.  My methods are not always "conventional", but they are fast, efficient, and produce good results. It's no secret that sewing time is precious and don't they say that whomever makes the most dresses wins??

PREPARE THE PARTS

Presumably you've already done a test fit with your interlining, made any needed changes to the pattern and interlining. You will have removed stitching and pressed theses pieces for reuse, and cut your fashion fabric from the corrected pattern.   

My favorite all purpose method for marking is with waxed dressmaker carbon and a tracing wheel as it is quick and accurate. On this pattern, except for this inset, do not mark the fashion fabric. Use the markings from your interlining.

I use clips to mark the pleats. The pleats are on grain, so with a tug at parallel clips, that pleat should fold right across for you.

 Then give it a press before it escapes!
Interface and complete the front to prepare it for merging with the interlining.

While you've got your iron hot, press your interlining to the fashion fabric to help temporarily bind the layers with heat. Pin the edges and baste the perimeter. 

Baste up the center of each dart.

After basting layers it's always a good idea to check your piece against the pattern and give it another trim.
 
 Sew all darts at one time, including the lining. Notice the uneven length of muslin to lining. This was a correction that I forgot about at the interlining fitting stage. I will end up trimming this away once I get to the bodice assembly! At this point thought, I'm still wondering why they don't fit.
I trim away excess and press open. If working with two colors like I am, it's handy to have two machines threaded, each with the correct color scheme for the palette.

INSET ASSEMBLY

Sewing that inset curve is just like sewing a princess seam. Always sew with the curved piece on top.  Be sure to trim that seam and press the seam down.

To sew the lining to the front, I sew each side separately, leaving the center seam free. I find my seams lay better.
Clip that center right up close to that stitching or it will pucker. You'll know when you turn it if you didn't clip close enough.
Turn right side out, understitch, press and baste the lining to the front. DONE!

BODICE ASSEMBLY

Once the center back and shoulders are sewn, it's time to insert the inset.
It was at this point that I realized WHY my interlining inset was 1/4" shorter than my matching pieces: I couldn't make it fit! Once I trimmed away that 1/4" to match my muslin, it fit between the symbols perfectly. BASTE the inset into place. We'll be doing a final fitting and you'll have opportunity to attach this permanently when attaching the lining.
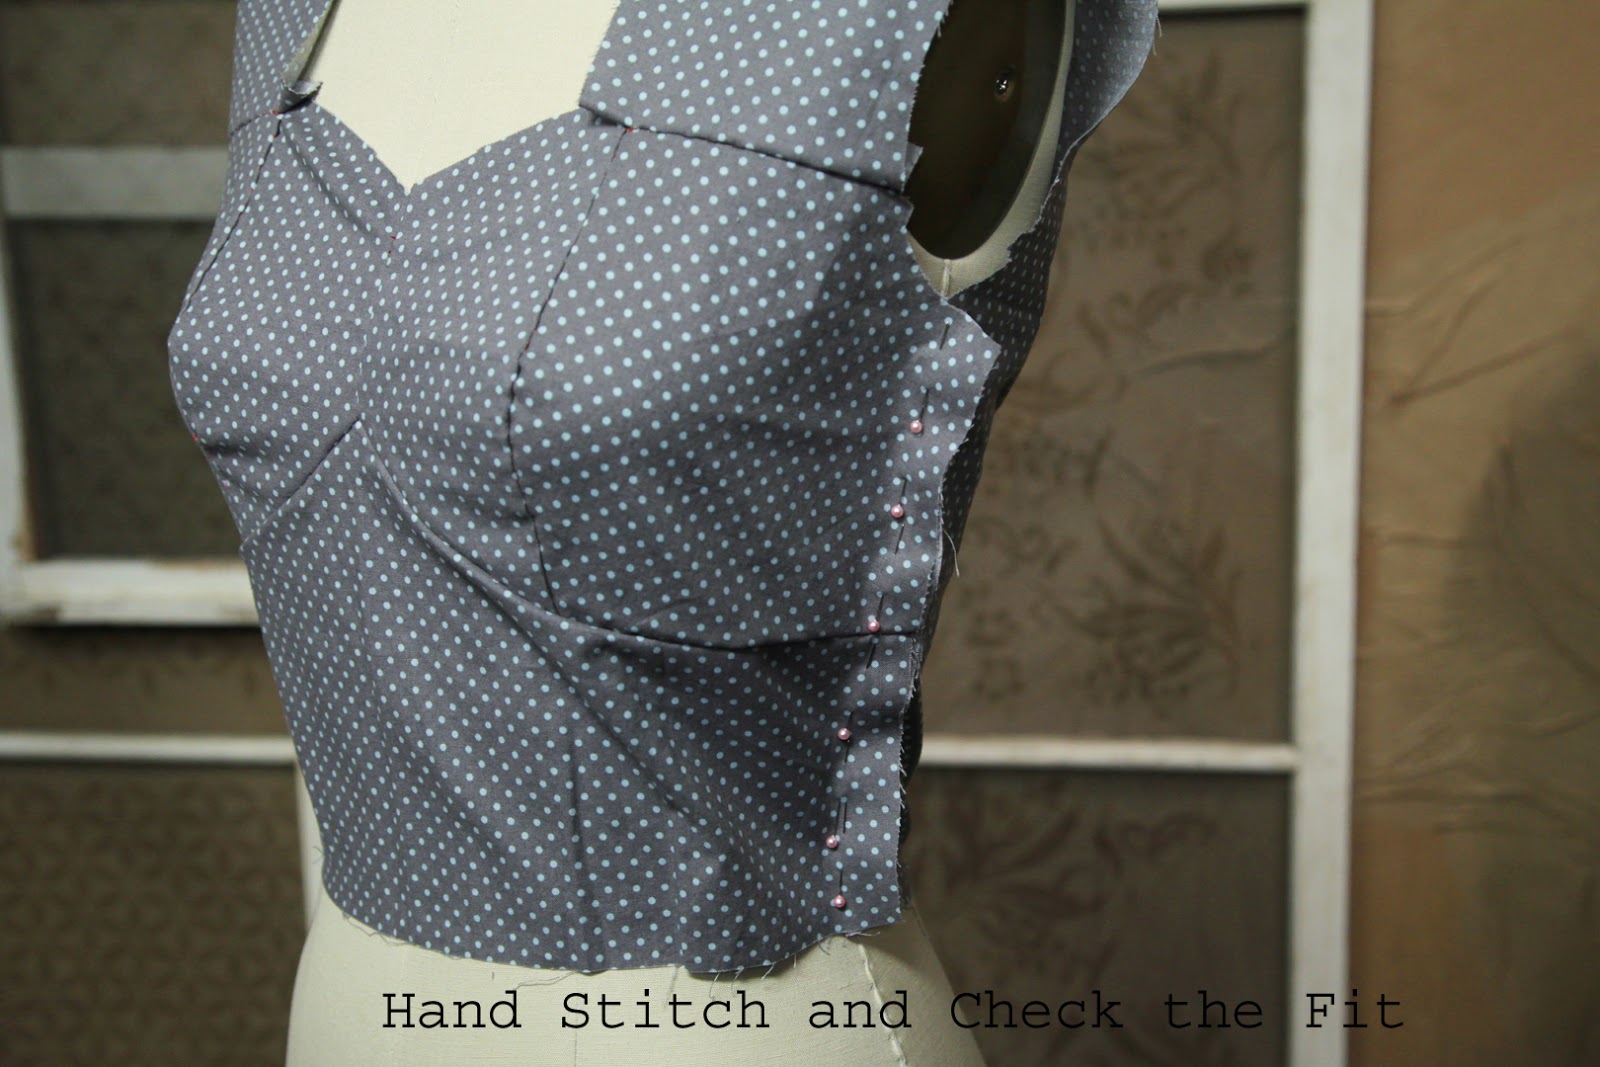
Pin the side seams in place and give the bodice a try-on. You can see mine didn't go perfectly, but nothing I can't fix.
 So undo the basting...
And re-pin to fit. Notice that I've pinned the bodice to my t-shirt underneath to keep from pulling too much. MUCH better, right?
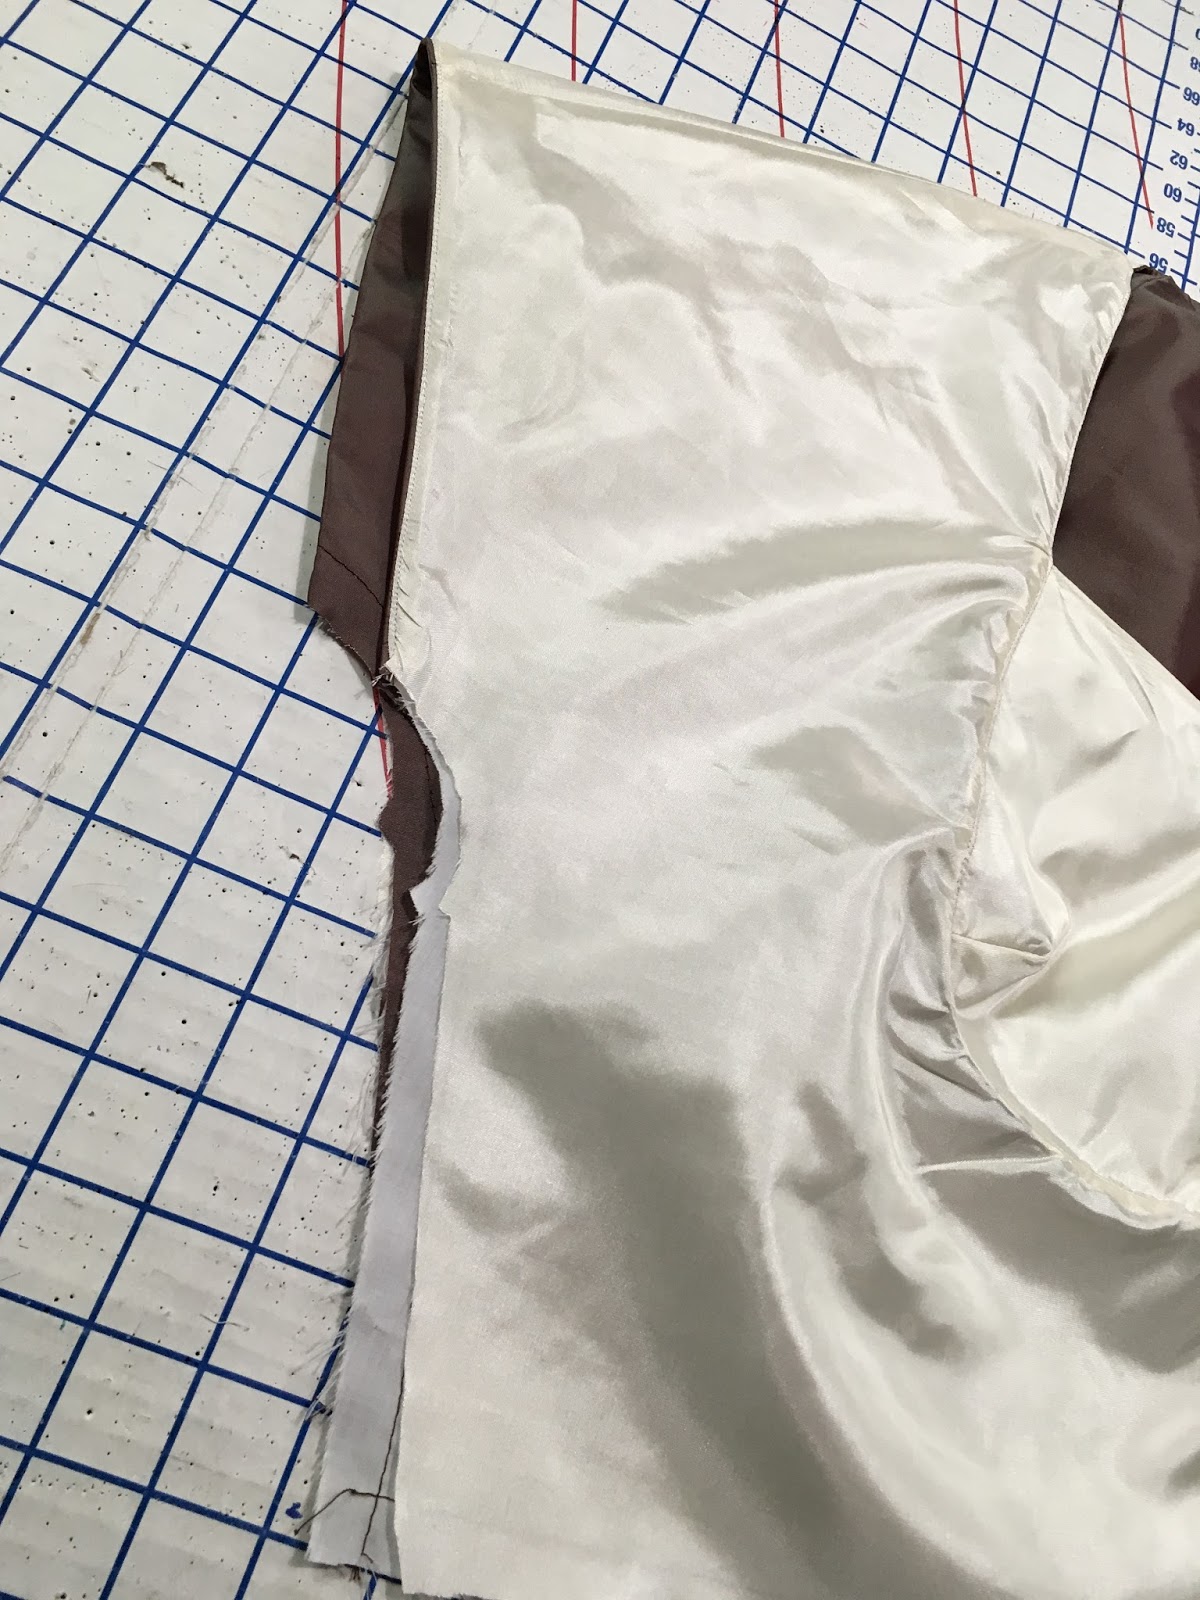
Once removed from my body, keep those pins in place and trim off the excess beyond the seam allowance.
Use the trimmings as a guide for cutting the opposite side to match. Re stitch the inset.
Now we are ready to sew lining around the neck. As before, you'll need to stay stitch that lining  under bust curve and clip to match to the inset. Don't forget to understitch and press the finished neck edge well.

Now I move to the sleeve hem. Turn the the sleeve and lining to right sides together, encasing the bodice sort of like a taco! 

Pin, sew and trim that sleeve hem.
Put your hand in there and turn it right side out. This is the fun part!!
Sew from back to front to understitch. The back has a larger opening to help you reach the front.

Just lovely! Now we move to the side seams. I usually start with the right side because the left side will have an opening for the zipper.
 Matching the sleeve hem seams first, I pin in place and make my way down the lining side, matching lining to lining and then the opposite fashion to fashion side, stitch up one side and down the other.
Trim seams and clip the underarm curves, press seam open.  Leave a 7" opening from the waist for the opposite side, basically sewing just the sleeve curves. Clip into the seam and trim the underarm, but be sure to leave all of your seam allowance for the zipper.

The lining is rolled to the inside and pressed. Doesn't that sleeve opening look beautiful?


If you've made it this far, then congratulations!  The hard part is done. Next we'll move on to the skirt and finishing!

You might be interesting in this post about altering this pattern (and FBA)
http://sewchicpatterns.blogspot.com/2018/02/sewing-with-sew-chic-altering.html

And this one about measuring and sizing for this pattern:
http://sewchicpatterns.blogspot.com/2018/01/sewing-with-sew-chic-preparing-to-sew.html


Are you making this dress? Leave me a note or a link!
Have a wonderful sewing day, and I'll see you next time!

Laura

Thursday, August 6, 2015

ASG Conference 2015 San Diego review

ASG Conference - What a Weekend!

I wore this outfit in the Saturday Fashion Show

My booth!
I recently returned from the American Sewing Guild Conference in sun-drenched San Diego. It was a busy few days, filled with workshops, lectures and fashion. Some of my favorite things had nothing to do with vintage, and that's partly why I go to this type of event -- to mix and mingle with craftspeople who have found their own niche. It's great to share our experiences and learn from each other!


Southern Belle, Simplicity #1061 poster and Tia on display.
Andrea hand painted the flowers on her jumpsuit
I met so many great people!


At the fashion show, Andrea Schewe pulled me aside and said "Is your name Lauren?" (An easy mistake, right?) She was looking for someone her sister asked her to meet. So it turns out I wasn't the right "Lauren" but we discovered our common thread as Simplicity designers, and she is such an easy lady to like!

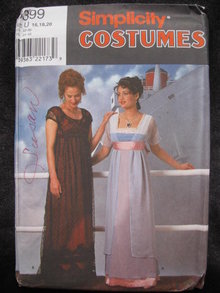
Here I am with Andrea, costume pattern designer extraordinaire at Simplicity. I learned she has been working for them for 30 years!  Recall those Titanic dresses that we all fell in love with? Yup, she's the one.  I still have my pattern too! Follow Andrea's blog here: http://www.andreaschewedesign.com/blog


You need to know about Bobbi Bullard. She is an embroidery designer and now she has a new way to teach kids (or anyone) to sew. She has started the Kids Sewing Studio, offering sewing classes for every age and ability, but what caught my eye was this idea of making a complete sewing class in a box! She has projects for the absolute beginner and for those with basic skills and they are so reasonably priced at $30. This is a great way to get started!

Bobbi Bullard and her friendly helpers.

No more excuses!

My next-door booth neighbors are talented bead jewelry designers from the San Diego Bead Society. It was so fun to exchange ideas and get to know them.They became one of our best customers, and hear this -- they don't even sew! I told them about the Simplicity 1061 sew along and they promised to join in.


Check out these amazing necklaces made by some of the members:

This award-winning bead necklace takes "statement" to a new level!

This necklace was made from vintage buttons


Meeting Diana Cavagnaro (dianacavagnaro.com) was amazing. She creates one-of-a-kind custom chic hats -- worn at the Kentucky Derby and by many celebrities. She also teaches millinery (hat making), has written many articles about her craft, and volunteered for years with the American Cancer Society. In fact, she was responsible for creating and donating more than 2,000 hats to cancer patients. I loved seeing her gorgeous creations and learning a little about the life of a hat-designer to the stars, and so much more! 

A few of Diana's millinery videos.
Diana and her talented staff!


I also met another designer I now admire. Julianne Bramson was one of the founders of the vintage reproduction line "Decades of Fashion." To start that line of patterns she said she bought about $10,000 in vintage patterns! She is now co-owner of Fashion in Harmony following her love for the 1930's bias cut in a modern way. This accomplished lady specializes in everything bias cut! In fact, she co-authored a book Bias Cut Blueprints that takes you from picking the right fabric, teaching a fun-to-sew method of bias cut clothing and customizing your piece, and, maybe most important, getting a great fit.
Julianne Bramson, from Fashion in Harmony
We spent a lot of time chatting and ended up trading patterns. It's so fun to meet someone who really loves what she does and is sharing her expertise with the rest of us. If you love the look of bias cut,  I recommend you check out her website and her book!

 It was a very very busy few weeks leading up to this event and the three days I was in San Diego flew by, but I had a great time and met some fabulous people. Thanks to all of you for being some of the highlights my weekend!

Until we meet again have a great sewing, designing or beading day!

Laura

Thursday, September 19, 2013

Craftsy Class Giveaway


Recently, I received photos and other graphics from the Craftsy class I taped in August.
 
Seeing these photos for the first time was pretty exciting and reminded me all over again why I accepted their request to teach this class. This new age of internet has made learning so accessible and affordable for everyone, no matter their station in life, and I am pleased that I can be a part of it.
We now call it information overload, but when I was learning to sew, this kind of specialized information was hard to get, if not from family or friends. Where would someone go to find someone willing to “show” us how?  As a teenager, I knew of a Russian woman in town that was a clothing designer and I wondered if she had something she could teach me? I was shy and insecure, and didn’t know the questions to ask. I only knew I wanted to learn.

I hope that anyone would be able to ask me. I invite you to ask me. Perhaps you don't know the questions either. This can make a project class (like those offered at Craftsy) so perfect. We learn by practice and doing. Even if you have been sewing for a long time, discovering a different way of "doing" is also of value. Remember that there are many roads that lead to Rome.

The Craftsy class is not quite ready for purchase, but while we wait, I’m happy to announce a class giveaway. Between now and Oct 8, 2013, please sign up to be entered into a giveaway for my class “Sewing Vintage: The Flirty Day Dress” through this link:

The winner will be announced on the first day of class, so stay tuned for that date! If you win, the class will be yours from day one.

So, until you see these banners everywhere........enter the giveaway, and Good Luck!