If you've been following along, you likely have your bodice together. If not, no worries, you can get to the post from here:
http://sewchicpatterns.blogspot.com/2018/02/sewing-with-sew-chic-simplicity-8439.html
On that page you'll also find links to the post about altering and choosing a size for this dress. If you are ready to move on to the skirt, you are in the right place!
First, begin by sewing the right and left back skirt pieces together, then the right and left front skirt pieces. Do not press these seams open. You'll need them flat. Do seam finish. Now you're ready to add the pockets to the skirt. My original was assembled with a more vintage method (above) in mind, but Simplicity's method does the job, it's just a bit tricky.
POCKETS
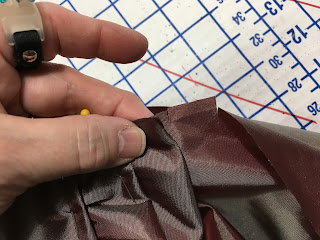
With right sides together, sew the pockets to the skirt front side seam between the symbols. Clip into the seam allowance perpendicular to the end of your stitching.Be sure to clip right up to that stitching, trim the seam allowance between. Use a little fray check to stabilize those clips.
Press the pocket with the seam toward the pocket.
With seam toward the pocket, understitch, being sure to leave the seam allowance outside of the clips free.
Turn the pocket to the inside.
Press the raw edges outward. If you didn't clip close enough to the stitching, you'll see a lot of puckering at the corners and they won't lay flat.
Slip the pocket facing under the skirt, right pocket sides together.
Now you'll need to baste the pocket back to the front skirt and pocket at the side seam. Leave the bottom clear of basting- open enough to sew the pocket bag. Baste exactly on the seam line, curving around that cut end to include all the raw edge. Do a good job with this because this basting will become your guide when sewing the side seam front to back.
Smooth out, pin the pocket bag.
The raw edges may not match, but keeping the bag smooth, flat, and aligned to the side seam is more important. Stitch the bag, then trim or include a seam finish as you desire. Do not baste the pocket to the skirt, as we need it free for now.
SIDE SEAM
Pin the pocket out of the way.Pin and sew front to back at the side seam. Be sure to leave an opening on the left side for the zipper.
check your pockets.
Press seams open, add seam allowance if desired.
PLEATING
If you've clipped your pleats like I have, now is the time to match those up.I start at the right side seam (this first pleat is smaller) with the skirt right side toward me, and work my way around the the skirt, all pleats folding to the left.
The side seam remains flat.
Baste around the waist. Re-sew any pleats that may droop below the cut line. Set the skirt aside for a moment.
WAIST STAY
Press the bodice side seam opening at 5/8".Mark the centers and seams. Cut to length.
Check it against your waist just to make sure!
Baste the hem tape to skirt over previous stitching.
SKIRT TO BODICE
Pin skirt to the bodice. The bodice front fold line should match to the fold near center front.With pleats on top, sew skirt to bodice over basting matching centers and side seams as marked.
Trim seam to match stay width.
ZIPPER
Because of the pockets and they way they have been assembled, this dress requires an invisible zipper. My methods are a little bit different that you will usually find, so here we go: Press under the side seam allowance, and press the zipper teeth flat as usual.These zippers are easy to get twisted, so I pin mine to both sides correctly to begin. Also, for this method to work, the zipper needs to be at least 2" longer than the opening.
Position the top stop to the inside above the opening under the arm. I use a regular zipper foot so that I can see where I'm stitching.
Lift the zipper to match the zipper fold with the pressed seam fold. Hold in place, stitch, and match again.
Move the pocket out of the way, stitching over previous basting.
Stitch zipper leaving a couple of stitches remaining before the end.
Close the zipper and mark the waist line.
Match the mark to the waist of the unsewn side. Pin. Sew from the waist to the top stop then turn garment around and stitch from the waist to the bottom.
Leave a tiny gap at the bottom to shimmy the zipper pull through.
Check your work: pocket opening, waist seams match, and that both lengths are the same.
Cut off the extra zipper length and zig zag over the teeth. Stitch the ends of the zipper tape to the seam allowance.
Press under the lining seam allowance. Press up the stay tape along seam. Pin and machine or hand stitch the lining over zipper tape and across waist.
I used a whip stitch at 1/4" intervals, but there are other appropriate hand stitches that can be used.
Press up the hem allowance. This skirt is perfect for the straight edge on the Bishops ruler. The skirt has a 2" hem allowance.
I like my pleats pressed, so here is what I do: Press the skirt pleats firmly about a third of the way down.
Then press them out again. It softens the line.
With a petticoat, I put the dress on my dress form and softly press the pleats to lay nicely, softly disappearing into the fullness at the hem. Finish off the hem with hem tape and a blind hem stitch.
https://www.facebook.com/groups/S8439SewAlong/
Have a great sewing day!
Laura


Your make is sooo much nicer than the magazine cover! I could see wearing yours...so pretty. And classic.
ReplyDelete