Simplicity #1061 Sew Along

Sunday, June 23, 2013

Straighten the Grain, Please

I have a pet peeve. I may have mentioned this before, but I'm going to mention it again. Most high end stores do not do this (thank you from the bottom of my heart!), but JoAnn Fabrics, (and many others) do this one thing that really gets me- they measure every inch so carefully along the fold or the selvage to make sure you won't get even one 1/2 inch more than what you (supposedly) paid for, but yet they don't start and end with an ON grain cut. Without this, you do not actually get the yardage that you've paid for, and if it shrinks at all with the pre-wash, you have lost even more of your purchase. In short, we the consumers are getting gypped.

My gripe isn't with the sales person (who likely doesn't sew) and is simply following the bosses instruction. I would like to see that any and all stores that sell fabric, and are pinching the fabric pennies, permanently change their procedure to include either tearing the fabric at both ends (where possible) or by taking the time to pulling a cross thread. This would also save me a step in the preparation process.

Once a (washable) piece of fabric gets home, it goes straight into the wash. I could minimize some fraying if I serged the cut ends, but I don't see the point to it because I have to cut the ends off anyway.
My fancy diagram is meant to show that whether measured from the selvage or the fold, it cannot come out quite right. When a fabric isn't cut on grain, the waste is also significant. Why straighten the grain? Because the fabric can't be folded together properly, and the paper pattern won't be laid perfectly on grain if I don't have a straight edge to start with, both length and width. To do this, I align the selvage and cross grain perpendicular to each other along a gridded cutting board before layout. This step is especially critical with slinky or silky slippery fabrics.
To find the cross grain, cut into the selvage about 1/2". If the fabric is a natural fiber (and sometimes a weak polyester can be torn), the yardage can be torn at this point.  If not, find a thread to pull. Pull that thread all the way across, carefully cutting with scissors along line left behind.Yes, the thread will likely break, but grab another next to it and keep going.
As I follow the actual thread, you can see how it's getting much wider. How much fabric do you think I will lose once I get to the other side?
What started out to be a 1" trim turned into 4". That's nearly an 1/8th of a yard!

So what can we do about this?
  • Right away, ask the attendant to cut or tear your yardage before and after with the cross grain. (I've noticed that my JoAnn store has begun to ask if you'd like your fabric torn, but only after they've measured it).
  • Don't chat with your cutter, and do count with them. I have never come up with too much over, but have been shorted many times, even up to a yard of fabric.
  • If you end up short, even after washing, call the store. As long as you don't cut into your fabric, JoAnn will exchange or accept returns for yardage with a receipt.
  • If your store cuts fabric with the grain already, PLEASE thank them for their care and concern, not just because it's good for their bottom line, but because you also get full use of the fabric you've paid for.
Together we can make a difference!


Saturday, June 15, 2013

The Fast Fabric Interface

A few weeks ago we made up the Tia Dress in the black and white cotton fabric you see below. There are quite a few pieces that need to be interfaced. To speed this process up, here is what we do: 

Step 1: With the fusible side up, lay your pattern pieces wrong side down on top of interfacing. Be sure the grain of your fabric runs with the interfacing length of goods.
 
 Step 2: With a large piece of paper, cover the top completely. We used 2 opened paper sacks, but any paper large enough will work, just be sure that any print/inks do not transfer with heat or steam.
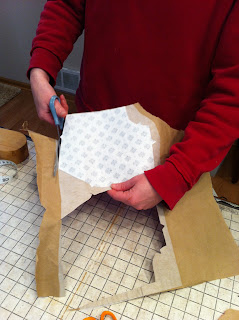
Step 3: With an iron, press each area to adhere the paper to the interfacing.
Step 4: Turn the paper over.
Step 5: Place a damp cloth over the first piece and press again from the backside, following the manufacturer's directions for length of time and iron temperature.
Step 6: Re-wet the cloth and press each additional pattern piece as needed.
Step 7: Cut each piece along the original cut line.

Step 8: Separate the paper from the fabric. You are now ready to sew!


Monday, June 10, 2013

Sew Vintage!

My husband was feeling very generous and just randomly stopped at an estate sale by the side of the road on Saturday. I take no joy in the fact that someone has died to make this sale possible, but I reverence the chance to get an insiders look at their life through the things that they have left behind, and of course I'm tickled to gather a few "special" finds. Though there was no sewing machine this time, in the corner were 3 ziplock bags filled with various assortments of notions and trimmings. I didn't even bother to sort through them first. For less than $10, here is some of what I found in those bags:
Let me show you some of this in detail:
 I thought it interesting that they advertise this elastic as "shrink resistant." Did elastic shrink too?
And it has a zig zag line to follow for stitching.
 Take a look at the quality of this tiny grosgrain ribbon!
I'm very excited about the various feet and guides in that metal box. They are for a short shank machine, so I think they will work with my old Morse.
 I've not seen a gizmo like this before. It's for mending a hem (the drapes maybe?) or for adding a row of thread guides like a tailor tack. The clear ruler has holes to punch through so your marks are even, but it looks like a lot of trouble to go through. The directions also tell you to punch through a blanket or cork board (which would make it even more difficult to do!) and then you cut the thread between the layers of fabric leaving a thread line. For sewing it might be fine, but I don't think it's a great invention as a thread guide.
This little tool was the invention behind the self threader on our modern sewing machine. Now I can thread all my machines without specticals! The original cost: .25 cents. This was a big splurge!

This sewing machine "attachment" with a copyright of 1946 is similar to, and used just like our modern day darning foot for free motion sewing. Remember that home sewing machines did not offer the "zig zag" or "swing needle" option, so this attachment was recommended for  everything a zig zag could do: mending, applique, buttons, hooks and eyes, snaps, quilting, overcast, darning, buttonholes, and even zippers- in case you don't have the foot.

The kits is almost complete with 2 attachments, a rubber band, and a small embroidery hoop (one side of the hoop is missing) for darning socks, but they recommend a regular size hoop for making buttonholes. They give us a size guide, but let me tell you, it will take some practice to use this tool for making buttonholes! In case the task of maneuvering that needle produces frustration, they've provided a sheet of short testimonials to remind the customer that others can do this:

"I am so happy about my buttonhole maker and sock darner. It certainly saves time and energy. all my neighbors envy me, so I know you will be getting orders from them soon. Frieda Brum, 7838 W. 43rd St. Lyons, ILL."

Don't you wish you had one too??

Tuesday, June 4, 2013

Come see Me: Rocky Mountain Sew Expo

It must be true that one thing leads to another, and that's how I got mixed in with the Rocky Mountain Sew Expo (at this late date) coming up July 11-13 in Denver, CO. I am actually quite excited to visit the Capital city of Colorado, whose state motto is "Nil Sine Numine" - interpreted as "Nothing without the Deity".  What a lovely motto compared to Oregon's:  "She Flies With Her Own Wings."  It goes quite nicely with my own simple, yet non-Latin motto: "Keep on Sewing"...and  I plan to help you do just that while I'm there at the Denver Merchandise Mart (with free parking!) The Expo officially runs Thursday through Saturday, but I get to share with you two of my favorite topics in a special pre-expo class on Wednesday afternoon and another class on Saturday morning. (Don't miss the special offer at the bottom!)

I don't care what your figure, there is nothing more beautiful than a well fitting bodice- and if it has that lovely vintage look, then it's a truly winning combo!


The Vintage Bodice  $46 - #WW-8
Wednesday July 10 1:30-5:30

Skill Level: Some sewing Experience

Do you wish you could cut a pattern from a newspaper just like grandma did?  Using the same methods, we will cut, sew and then perfect the fit of a basic 1950’s bodice using a printed (or self-drafted pattern).

Learn how to adapt this pattern to copy the vintage looks you love! Using ½ size practice patterns, we will also make collars, facings, linings, yokes and more. Kit includes the basic full size pattern, 1/2 size pattern, and pattern  paper to be used in class, and directions for drafting sleeves, a gathered and circle skirt so you can finish off your dress in style!
Kit fee $25 paid to the teacher in the classroom
Please wear a quality bra and light t-shirt/tank top for fittings!
Bring to class:
  • Sewing machine in good working order
  • 1 ½ yards of quality muslin fabric
  • fabric marking pencil
  • seam ripper
  • tracing wheel
  • dressmakers carbon
  • highlighter
  • paper scissors, fabric scissors
  • straight pins
  • measuring tape
  • scotch tape (magic tape is best)
  • clear C-thru ruler, with grid (like a quilting ruler)
  • thread
  • mechanical pencil
I LOVE fashion and sewing history. In class I will tell you why. You might be surprised at what you will learn!

 A Pattern for History  $8 #SS-60
Saturday July 13 9-10am

Are you in love with vintage patterns and want to learn more about them? Do you know why most patterns are not printed?

Learn something about the culture they were made for and what you can expect from these flea market finds by general era from the 1920’s to 1980’s and discover how they differ from modern patterns in terms of fit, sizing, technique, and pattern information.

Q & A at the end.

Order classes here: 
http://rockymountainsewexpo.com/easy-order.htm

I want to see some vintage going on in Colorado!

Special Offer: Come to the show wearing something you have made from one of my patterns. Visit me in booth #422 and get 30% off one pattern of your choice.

Learn more about the show: http://rockymountainsewexpo.com/